5 Easy Christmas Crafts For Kids
The holiday season is a wonderful and magical time for kids. Getting them involved in decorating and activities can help them get even more excited about Christmas. Let their creativity shine by giving them festive art projects to do during the holidays! Here are 5 easy Christmas crafts for kids to make that can double as decorations.
Paper Plate Santa Claus & Friends
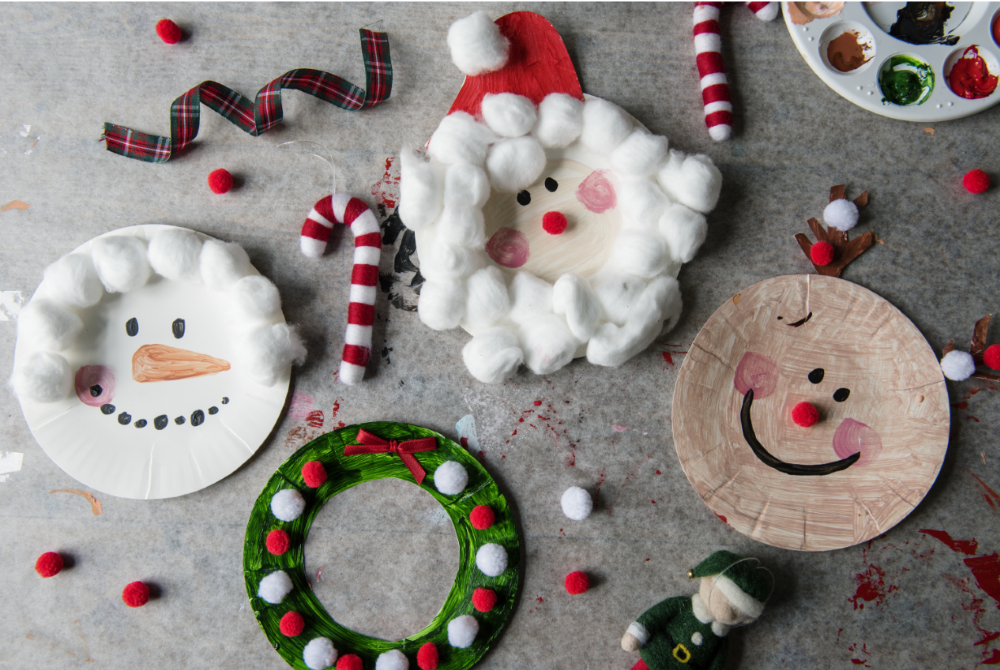
The paper plate Santa Claus and friends project is an easy and fun Christmas craft for young kids to make! These cute plates can be displayed on the fridge with magnets or leaned against the wall on your mantel. You can even turn them into ornaments if you use smaller plates and punch a hole towards the top for a ribbon.
While you can make Santa, Rudolph, a Snowman or a wreath, we have simply provided instructions for Santa and Rudolph to get you started!
Supplies Needed
Large White Paper Plates
Cotton Balls
Red Pom Pom Balls
Colored Construction Paper
Colored Pencils
Glue
Directions
How To Make Santa:
- First make Santa’s hat. Take a sheet of red construction paper and cut out a triangle. Glue it to the top edge of the plate and then glue a cotton ball onto the tip of the triangle.
- Time for Santa’s beard and hair! Take about 20 cotton balls and glue them around the edge of the plate, leaving a small circle in the middle
- Finally, fill in Santa’s face. Color in the blank circle with a skin shade colored pencil. Draw in the eyes, two red circles for blushed cheeks, and glue on a red pom pom for his nose.
How To Make Rudolph:
- Color in the entire plate with a brown colored pencil.
- Give Rudolph some eyes, rosy cheeks, a big smile, and his iconic red pom pom nose.
- Take some brown construction paper and cut out 2 antlers. Glue them to the top of the plate.
- Glue red and white pom poms to his antlers for some extra festive cheer.
Popsicle Stick Ornaments
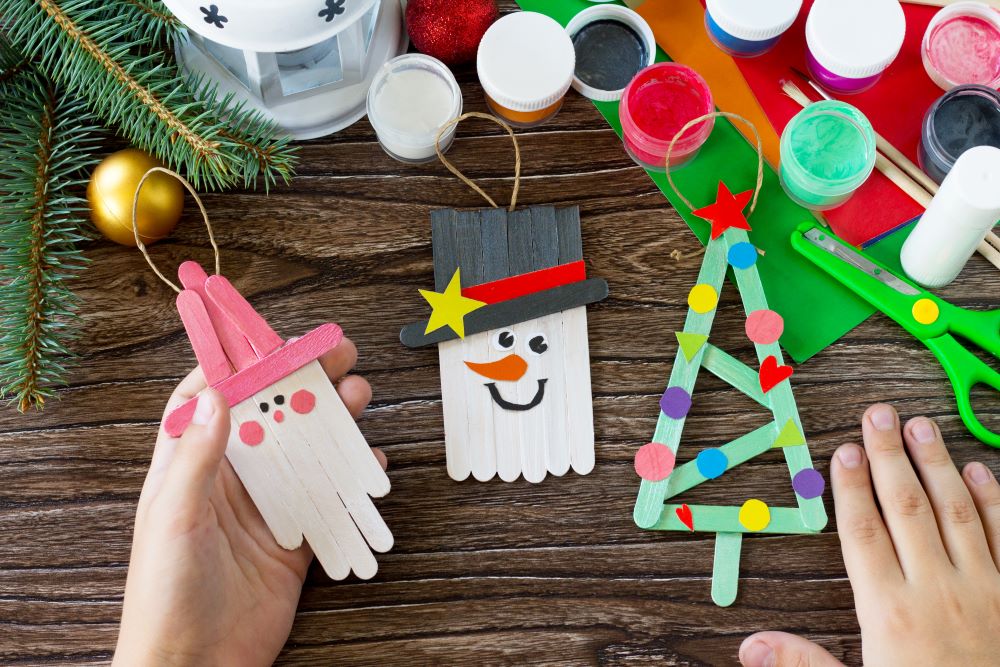
These popsicle ornaments are a fun and creative way to get your kids involved in Christmas decorating! This is a great Christmas craft for kids of all ages – younger kids can make more simple ornaments while older kids can take on more of a challenge. These ornaments are something you can keep and cherish for years to come.
While these instructions explain how to make a snowman and a Christmas tree, you can choose to make any other characters and shapes as well!
Supplies Needed
Various Sized Wood Craft Sticks
Markers
Colored Construction Paper
Glue
Twine
Directions
How To Make The Snowman:
- Line up 6 wood craft sticks side by side. Glue a separate craft stick toward the top, diagonally.
- Color in the diagonal stick and the top half of the 6 sticks with a black marker. This is the top hat.
- Make the snowman’s face by drawing in the eyes and smile. Cut out a carrot nose using orange construction paper and glue it on.
- Decorate the hat with construction paper cutouts – get as creative as you want!
- Finally, glue a small loop of twine at the top so you can hang it from your tree.
How To Make The Tree:
- Glue craft sticks together in a triangle tree pattern. Color them all in with a green marker.
- Cut out various shapes from different colored construction paper to represent the ornaments. Glue them onto the craft stick tree in any way you want.
- Glue the loop of twine at the top to hang from the tree!
Pasta Wreath
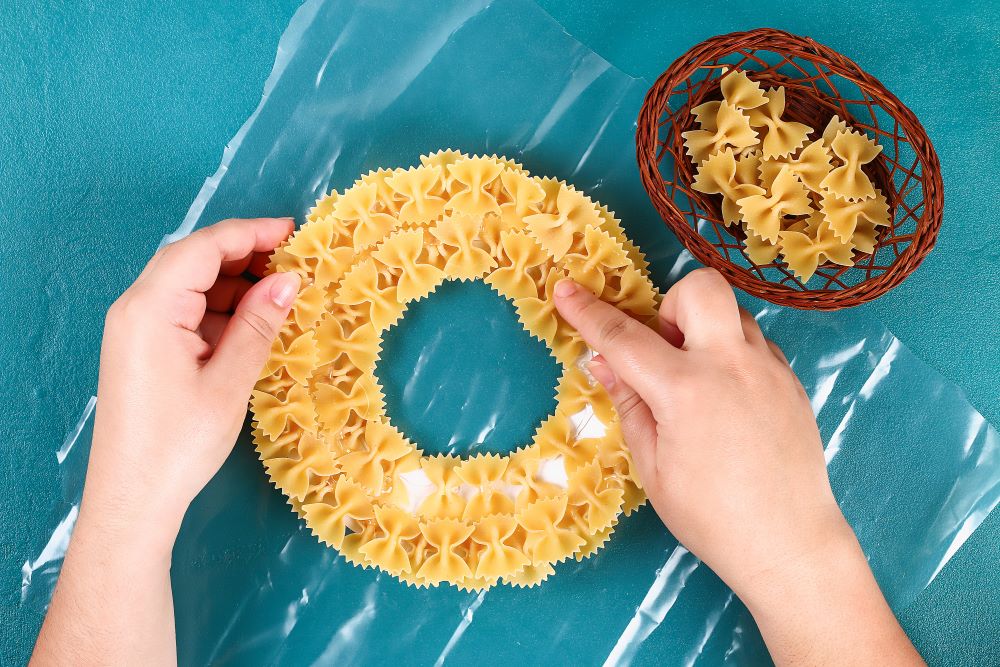
The pasta wreath is a craft that is easy for kids to make but may require adult supervision when it comes to the glue and spray paint. To make it even more fun, let your kid choose the color of spray paint that they want to use. It doesn’t necessarily have to be a Christmas color.
Our instructions say to use bow-tie pasta; however you can choose to use any type of pasta you want or even combine a variety of pastas!
Supplies Needed
1 Box Uncooked Bow-tie Pasta
Large Paper Plate
Tacky Glue
Green, Red, or Gold Spray Paint
Holiday Ribbon
Directions
- Cut out a circle in the center of the paper plate. Hole punch a small hole towards one of the edges.
- Evenly distribute glue around the plate – make sure all the space is covered!
- Carefully place each bow-tie pasta on top of the plate in a pattern of your choice.
- Keep gluing pasta to the plate until you don’t see anymore white space.
- Let the glue dry.
- Using a color of your choice, spray paint the pasta wreath until it’s fully colored.
- Once the paint dries, tie a festive ribbon through the hole you made on the plate.
- Hang it up with the rest of your Christmas decorations!
Paper Bag Reindeer
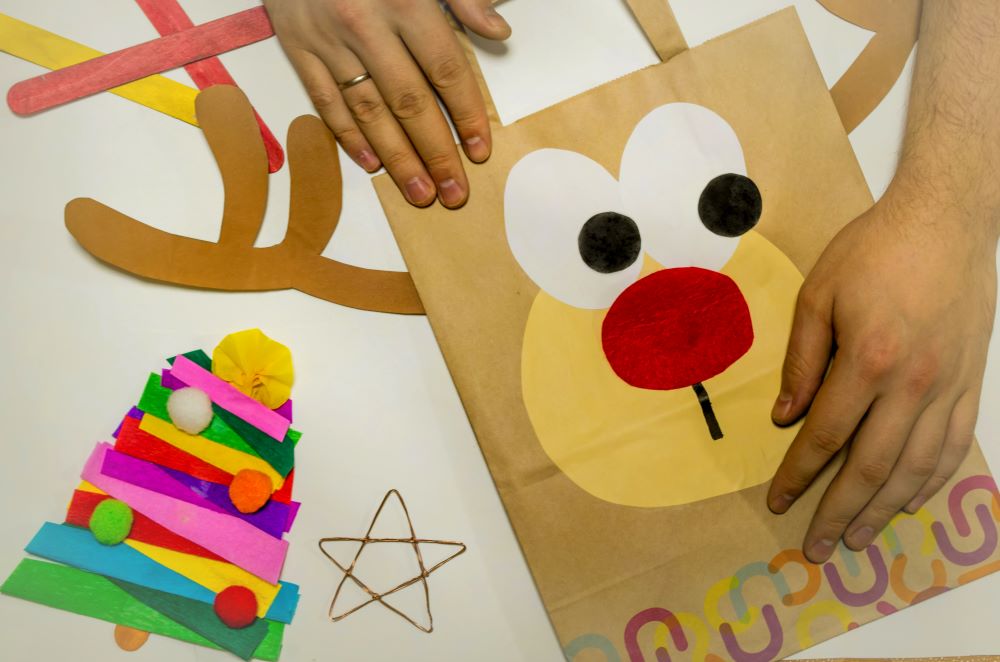
The paper bag reindeer is a cute way for kids to get excited about Christmas and learn more about Rudolph. While you will have to help your kid cut out the different shapes, this craft is fairly easy for kids to make.
If you want to get even more creative, you can also craft other characters on the paper bag, whether they are Christmas characters or made up characters!
Supplies Needed
Brown Paper Bag
Brown, White, Black, and Yellow Construction Paper
Red Marker or Big Red Pom Pom
Glue
Directions
- First, cut out all of the shapes that you will need: cut 2 antlers out of brown construction paper, 2 ovals out of white construction paper and 2 small black circles for the eyes, and a yellow circle for the face.
- Start by gluing the yellow circle to the center of the paper bag. Then, glue the eyes to the top of the yellow circle.
- Use a red marker to draw in a big red nose or glue on a red pom pom.
- Finally, glue the 2 antlers to the sides of the bag towards the top.
Felt Tree Christmas Ornaments
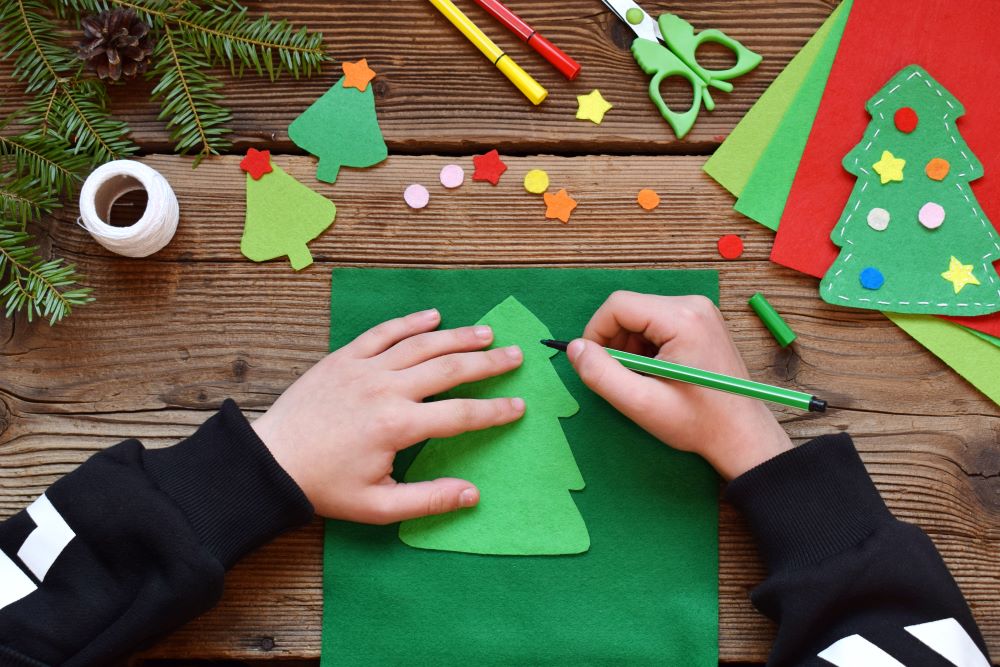
The felt tree Christmas ornaments are a perfect craft for older kids to make, but younger kids can also make these with some help. They will get excited to make these and see them hanging on the Christmas tree during the holiday season.
Feel free to make other Christmas symbols and character out of the felt – use the same process but with a different stencil cut-out!
Supplies Needed
Felt Scraps (Multiple Colors)
Cotton Balls
Christmas Tree Stencil
Fabric Glue
Twine
Scissors
Directions
- First, cut out 2 Christmas tree shapes using green felt and a stencil.
- Lay 7-10 cotton balls on top of one of the trees. Note: number of cotton balls may vary based on the size of the tree you cut out.
- Outline the tree with fabric glue and glue the other felt tree on top. Make sure the cotton balls stay in between the 2 trees!
- While the glue is drying, cut out various shapes with different colored felt pieces – these are the ornaments! The shapes can be circles, stars, or anything else that you want.
- Glue the shapes on the tree on both sides and glue a star on the top.
- Finally, glue a loop of twin on the top to hang from your tree!
Looking for more holiday inspiration? We’ve got you covered! Our Holiday Headquarters has everything you need from gift ideas, Christmas decorations galore, and even more to get you ready for the holiday season!


I sent for 2red trucks with a lighted tree , somehow I have been sent 2more. So all together I have received 4red trucks. I think someone wasn’t looking at my order very closely. I am going to keep all of them, I just do not want another truck. Be more careful . Could I get some gift or money for the mistake.
Hi Mary – We apologize for the confusion and extra items. We are unable to provide any compensation for this shipping error, as they were not included in your billing. Happy Holidays
I have called, text, written, blogged, emailed. Still have not heard a word. Your site will not allow me to click on ANYTHING. Can’t shop, can’t look at my cart. Nothing. It’s been months. Please get back to me and where’s my catalogue?
Good morning Christine – We apologize that you’ve not resolved the matter. However, in reviewing your account, there are no issues on our side. In March you requested a catalog and in April you were able to contact an Agent to request a catalog. Please clear your cookies, close the browser and start a new browser.
We also suggest checking for blocked pop-ups, as we are not experiencing web issues.
Please provide an update once you’ve tried these steps.