
7 No Carve Pumpkin Decorating Ideas
Decorating a pumpkin in the fall time for Halloween is a must, but carving can be difficult, time-consuming, and messy.
If you want to decorate a pumpkin and avoid all those roadblocks, there are ways to do it without carving, such as painting and drawing. You just need to give a little bit of time, have an artistic vision, and use a dash of creativity.
Here are 7 no carve pumpkin decorating ideas for you to try this Halloween.
1. Marker Face Pumpkins
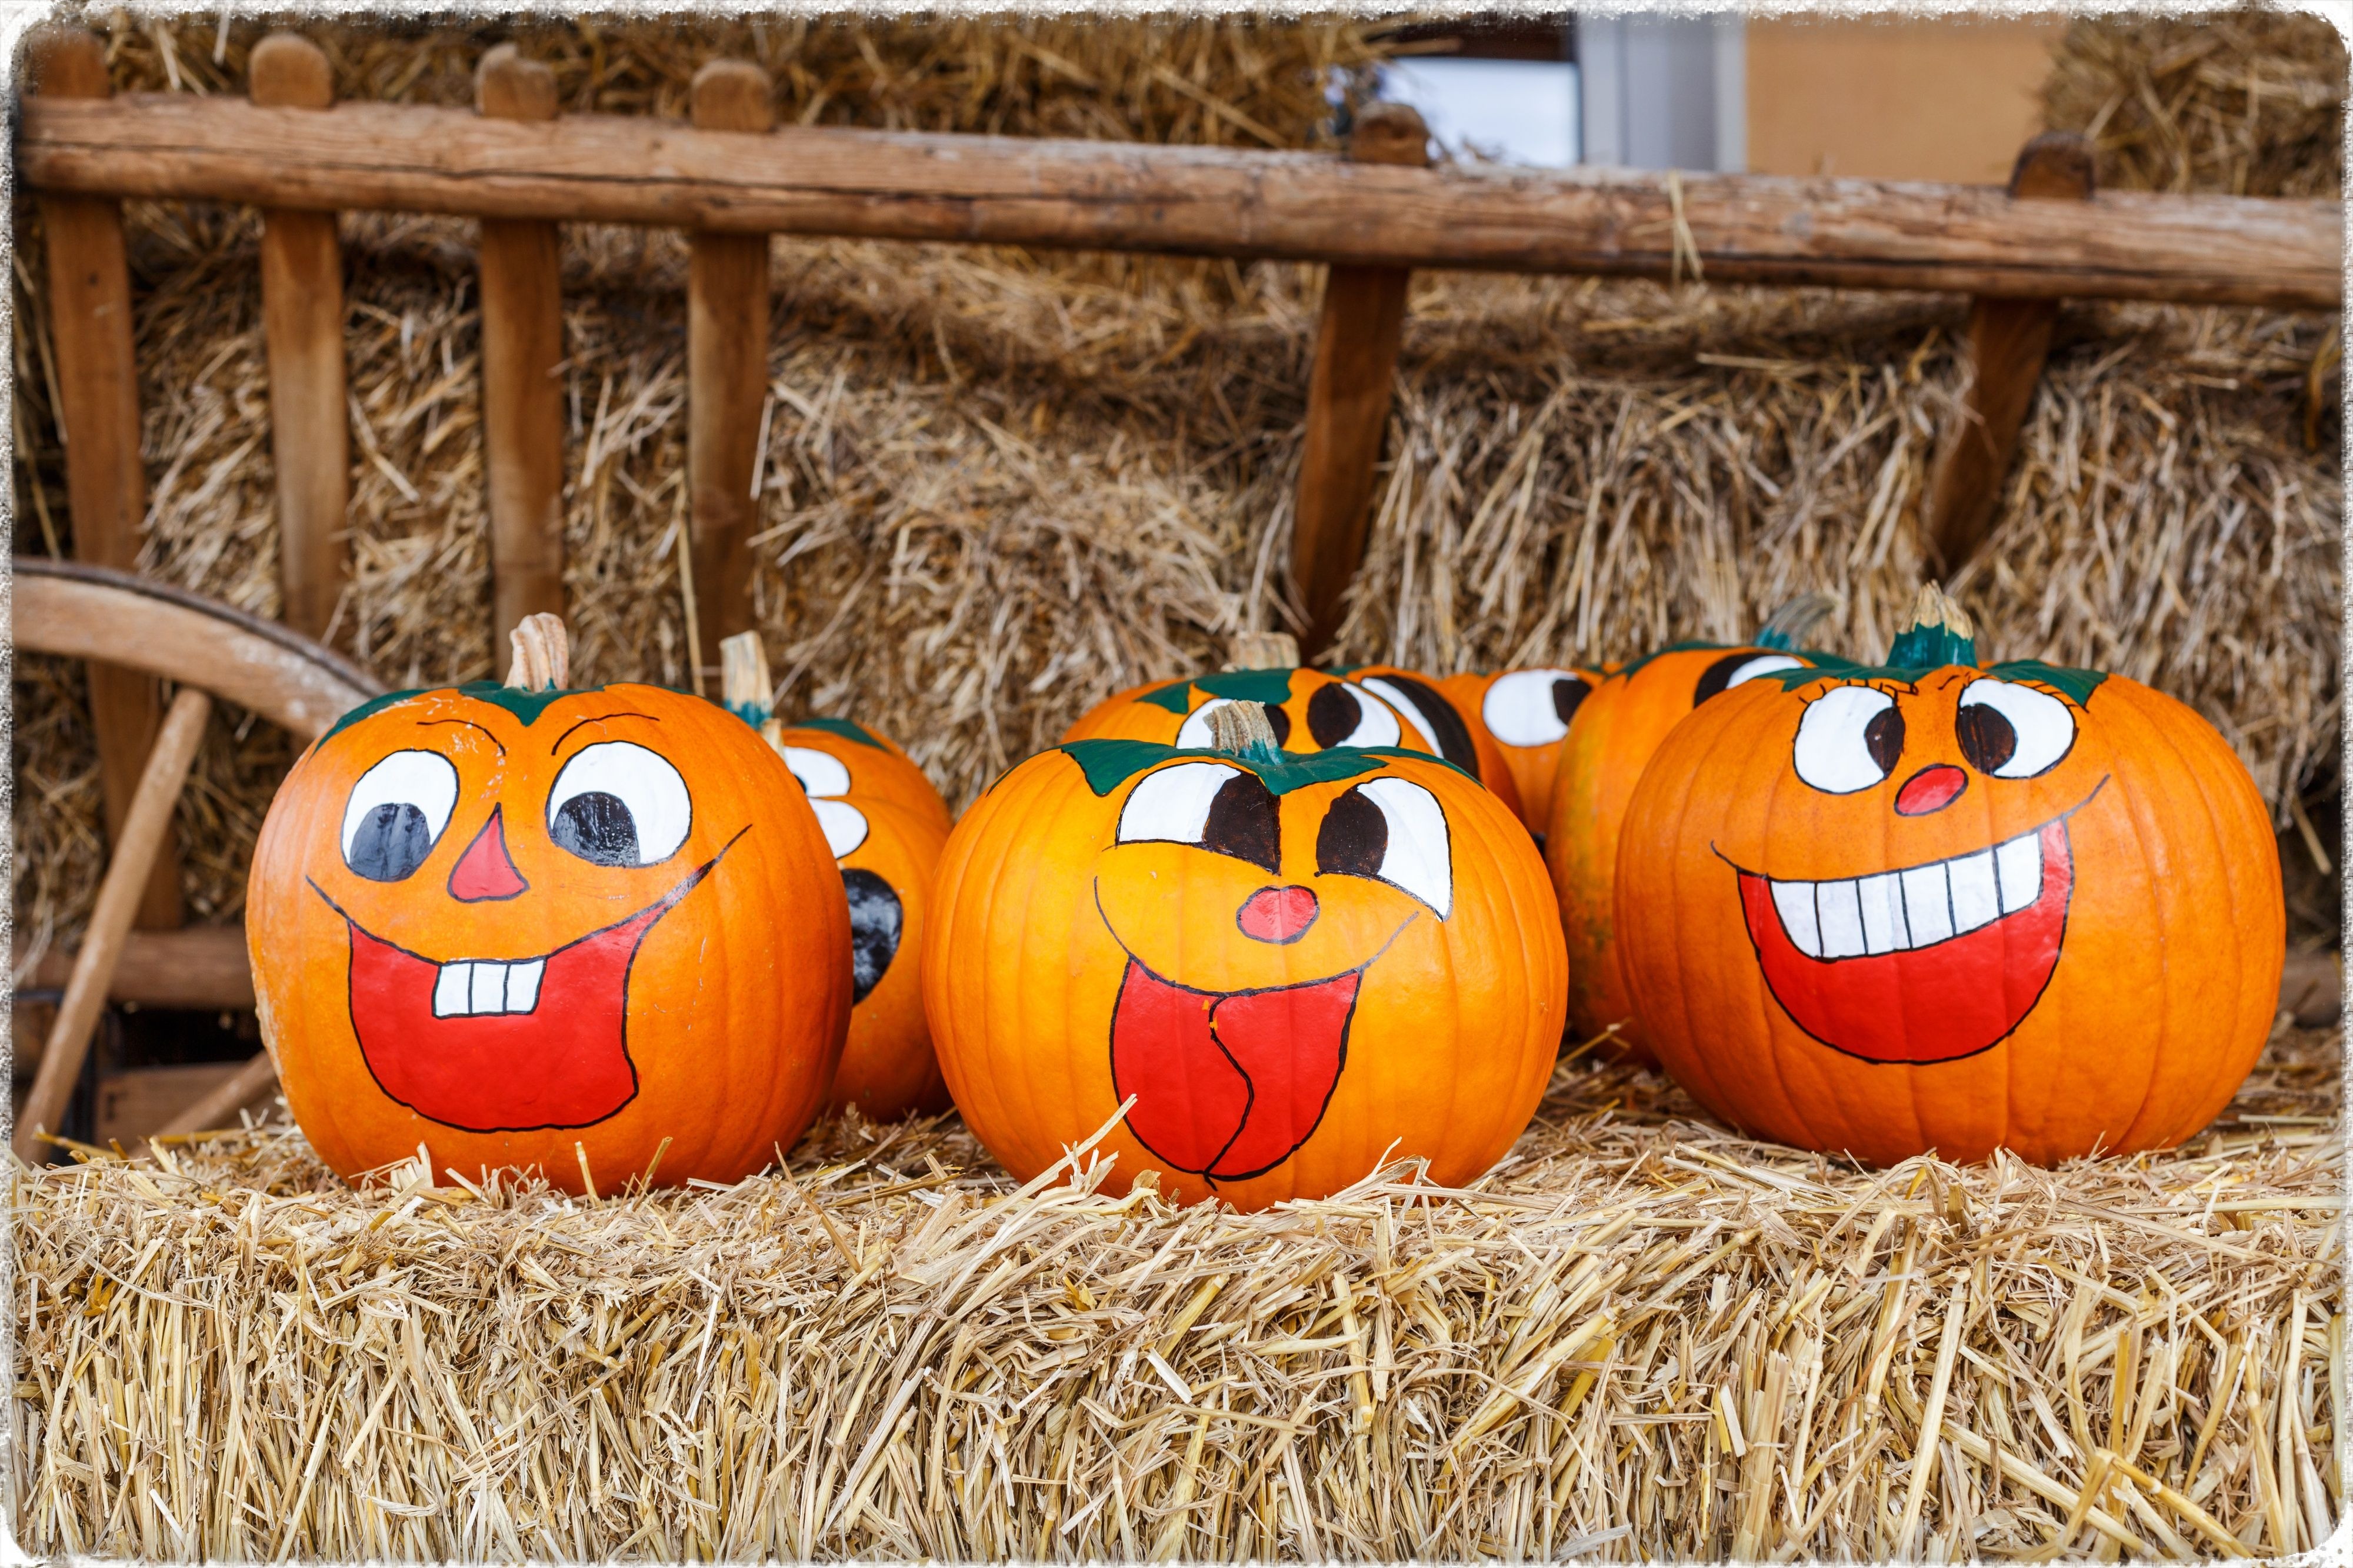
The marker face pumpkins are a whole new take on the classic jack-o’-lantern. With markers, you can easily and more accurately get the pumpkin face that you envisioned without the hassle of carving. Make it wacky or scary – it truly depends on your personality and your view of Halloween. This is perfect craft for both you and your kids to do together!
Supplies You’ll Need
Pumpkin
Pencil
Fine Tip Permanent Markers (Variety of Colors)
Printed Out Face Stencil (Optional)
How To Craft
Step 1: Using a pencil and face stencil (optional), lightly sketch out the desired face onto the pumpkin.
Step 2: With a black marker, trace along the pencil lines you made.
Step 3: Now is the fun part! Using a variety of colored markers, color in the face in a creative way.
Step 4: Display your colorful masterpiece on your front porch for all the trick-or-treaters to see!
Looking for even more colorful decorations to add to your porch?
Check out our Selection of Halloween Pumpkins!
2. Pumpkin Mouse or Animal
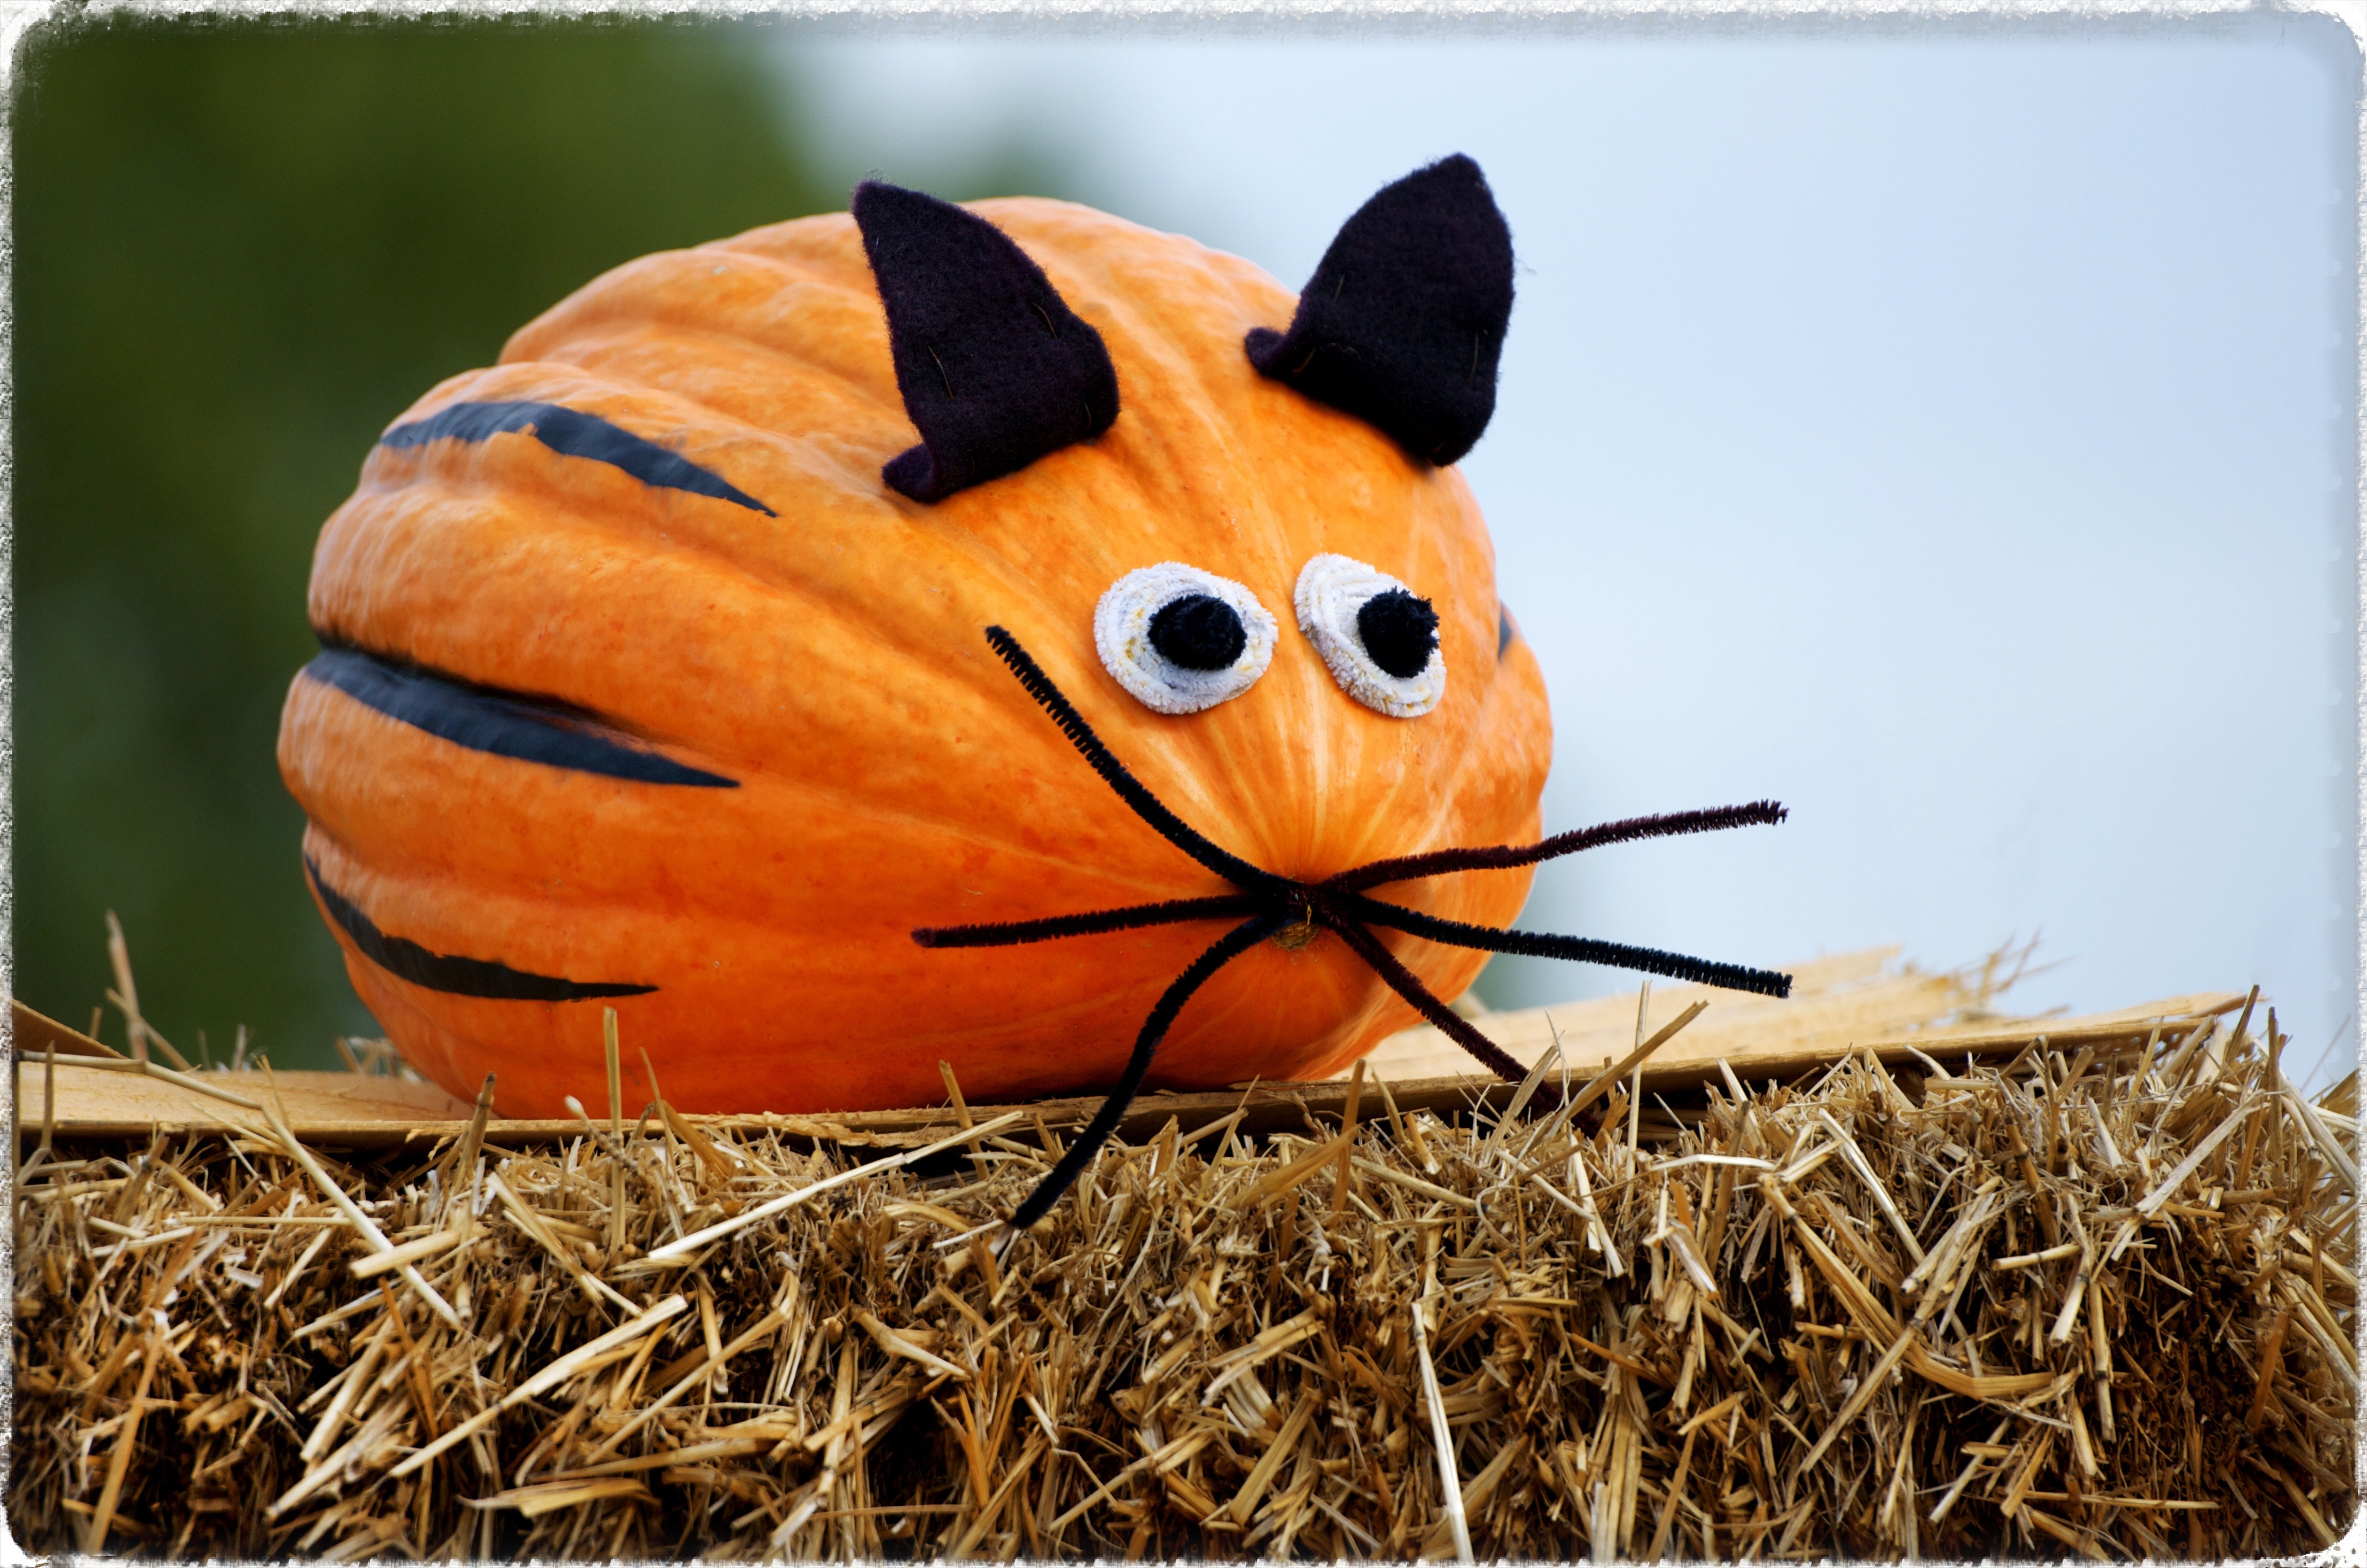
The pumpkin mouse is a great choice for any kids (or adults) who love animals! While these directions are strictly for crafting a mouse, you can roll off the same concept by creating a different animal of your choosing. With just some glue and craft supplies, this is much simpler than carving a pumpkin!
Supplies You’ll Need
Pumpkin
Pipe Cleaners
Black Permanent Marker
Small Pack of Black Felt Squares
Superglue
Scissors
Googly Eyes (Optional)
How To Craft
Step 1: Turn the pumpkin onto its side.
Step 2: Roll up 2 white pipe cleaners in 2 separate spirals. Glue onto the pumpkin for the start of the eyes. Then, roll up 2 separate black pipe cleaners into balls. Glue to the middle of the white pipe cleaners to represent pupils. (Optional: instead of using pipe cleaners, glue on two googly eyes).
Step 3: Take 3 black pipe cleaners and glue them onto the base of the pumpkin in a whisker pattern.
Step 4: Next, cut out 2 equal triangles from the felt squares. Glue the triangles on the side of the pumpkin above the eyes. Now your mouse has ears!
Step 5: Using the black marker, draw vertical stripes along the side of the pumpkin. You can also draw another design of your choosing.
Step 6: Create a whole family of pumpkin mice of different sizes (optional) and display them all outside.
Want to continue the animal theme for Halloween? You’ll love our Halloween Dress-Up Mice and our Halloween PAW-ty Pups!
3. Playfully Patterned Pumpkins
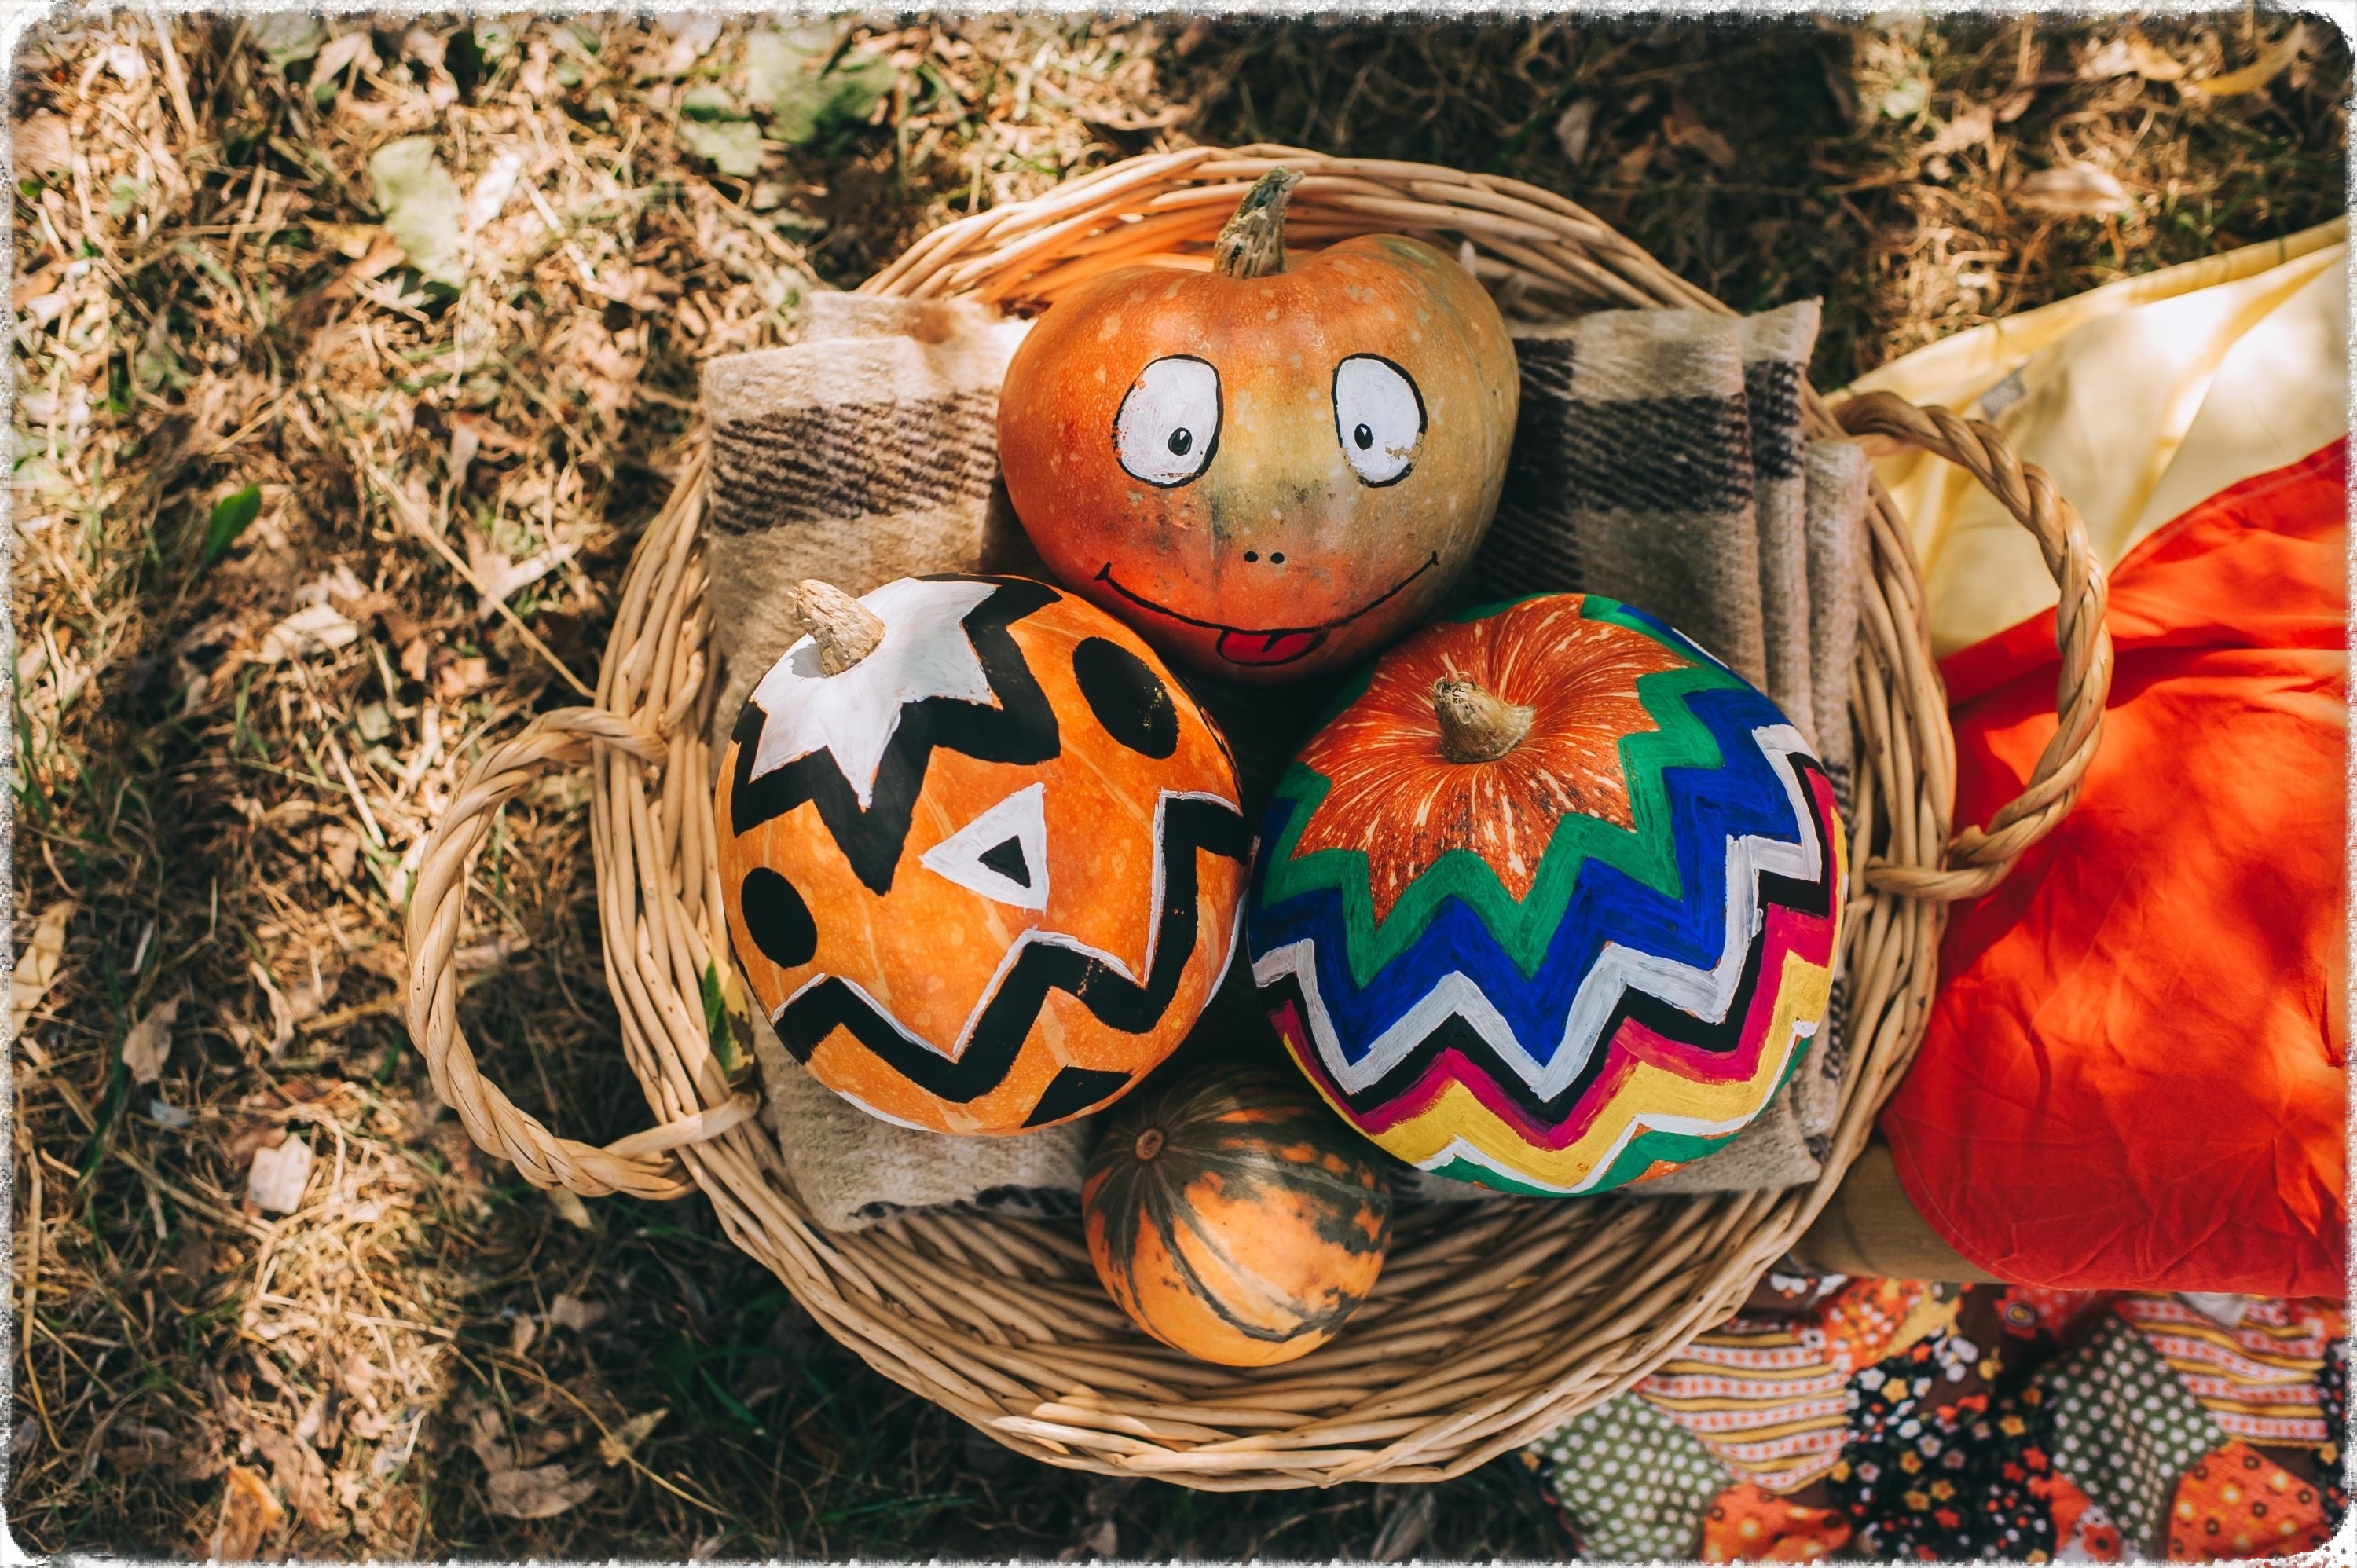
These patterned pumpkins are ideal for those who are already artistically skilled or those who want to add a little extra creativity to their life. You can make the pattern as simple or as complex as you imagine it to be. Note: beginners may want to use small pumpkins to practice on before painting a large one.
Supplies You’ll Need
Pumpkin
Pencil
Acrylic Paints (You Choose the Colors!)
Paintbrushes (Variety of Sizes)
Stencil of Shapes/Patterns (Optional)
How To Craft
Step 1: Trace out your pattern with a pencil. If you are unsure of what pattern to do, print out a stencil as a guide.
Step 2: Feel free to skip step 1 if you are more advanced at freehand painting!
Step 3: Fill in your pattern with as many paint colors as you would like.
Step 4: Let it dry on top of a newspaper. Your patterned pumpkin would look great displayed indoors!
For even more inspiration for transforming your house on Halloween, view our selection of Halloween decor and more!
4. Glittery Pumpkins
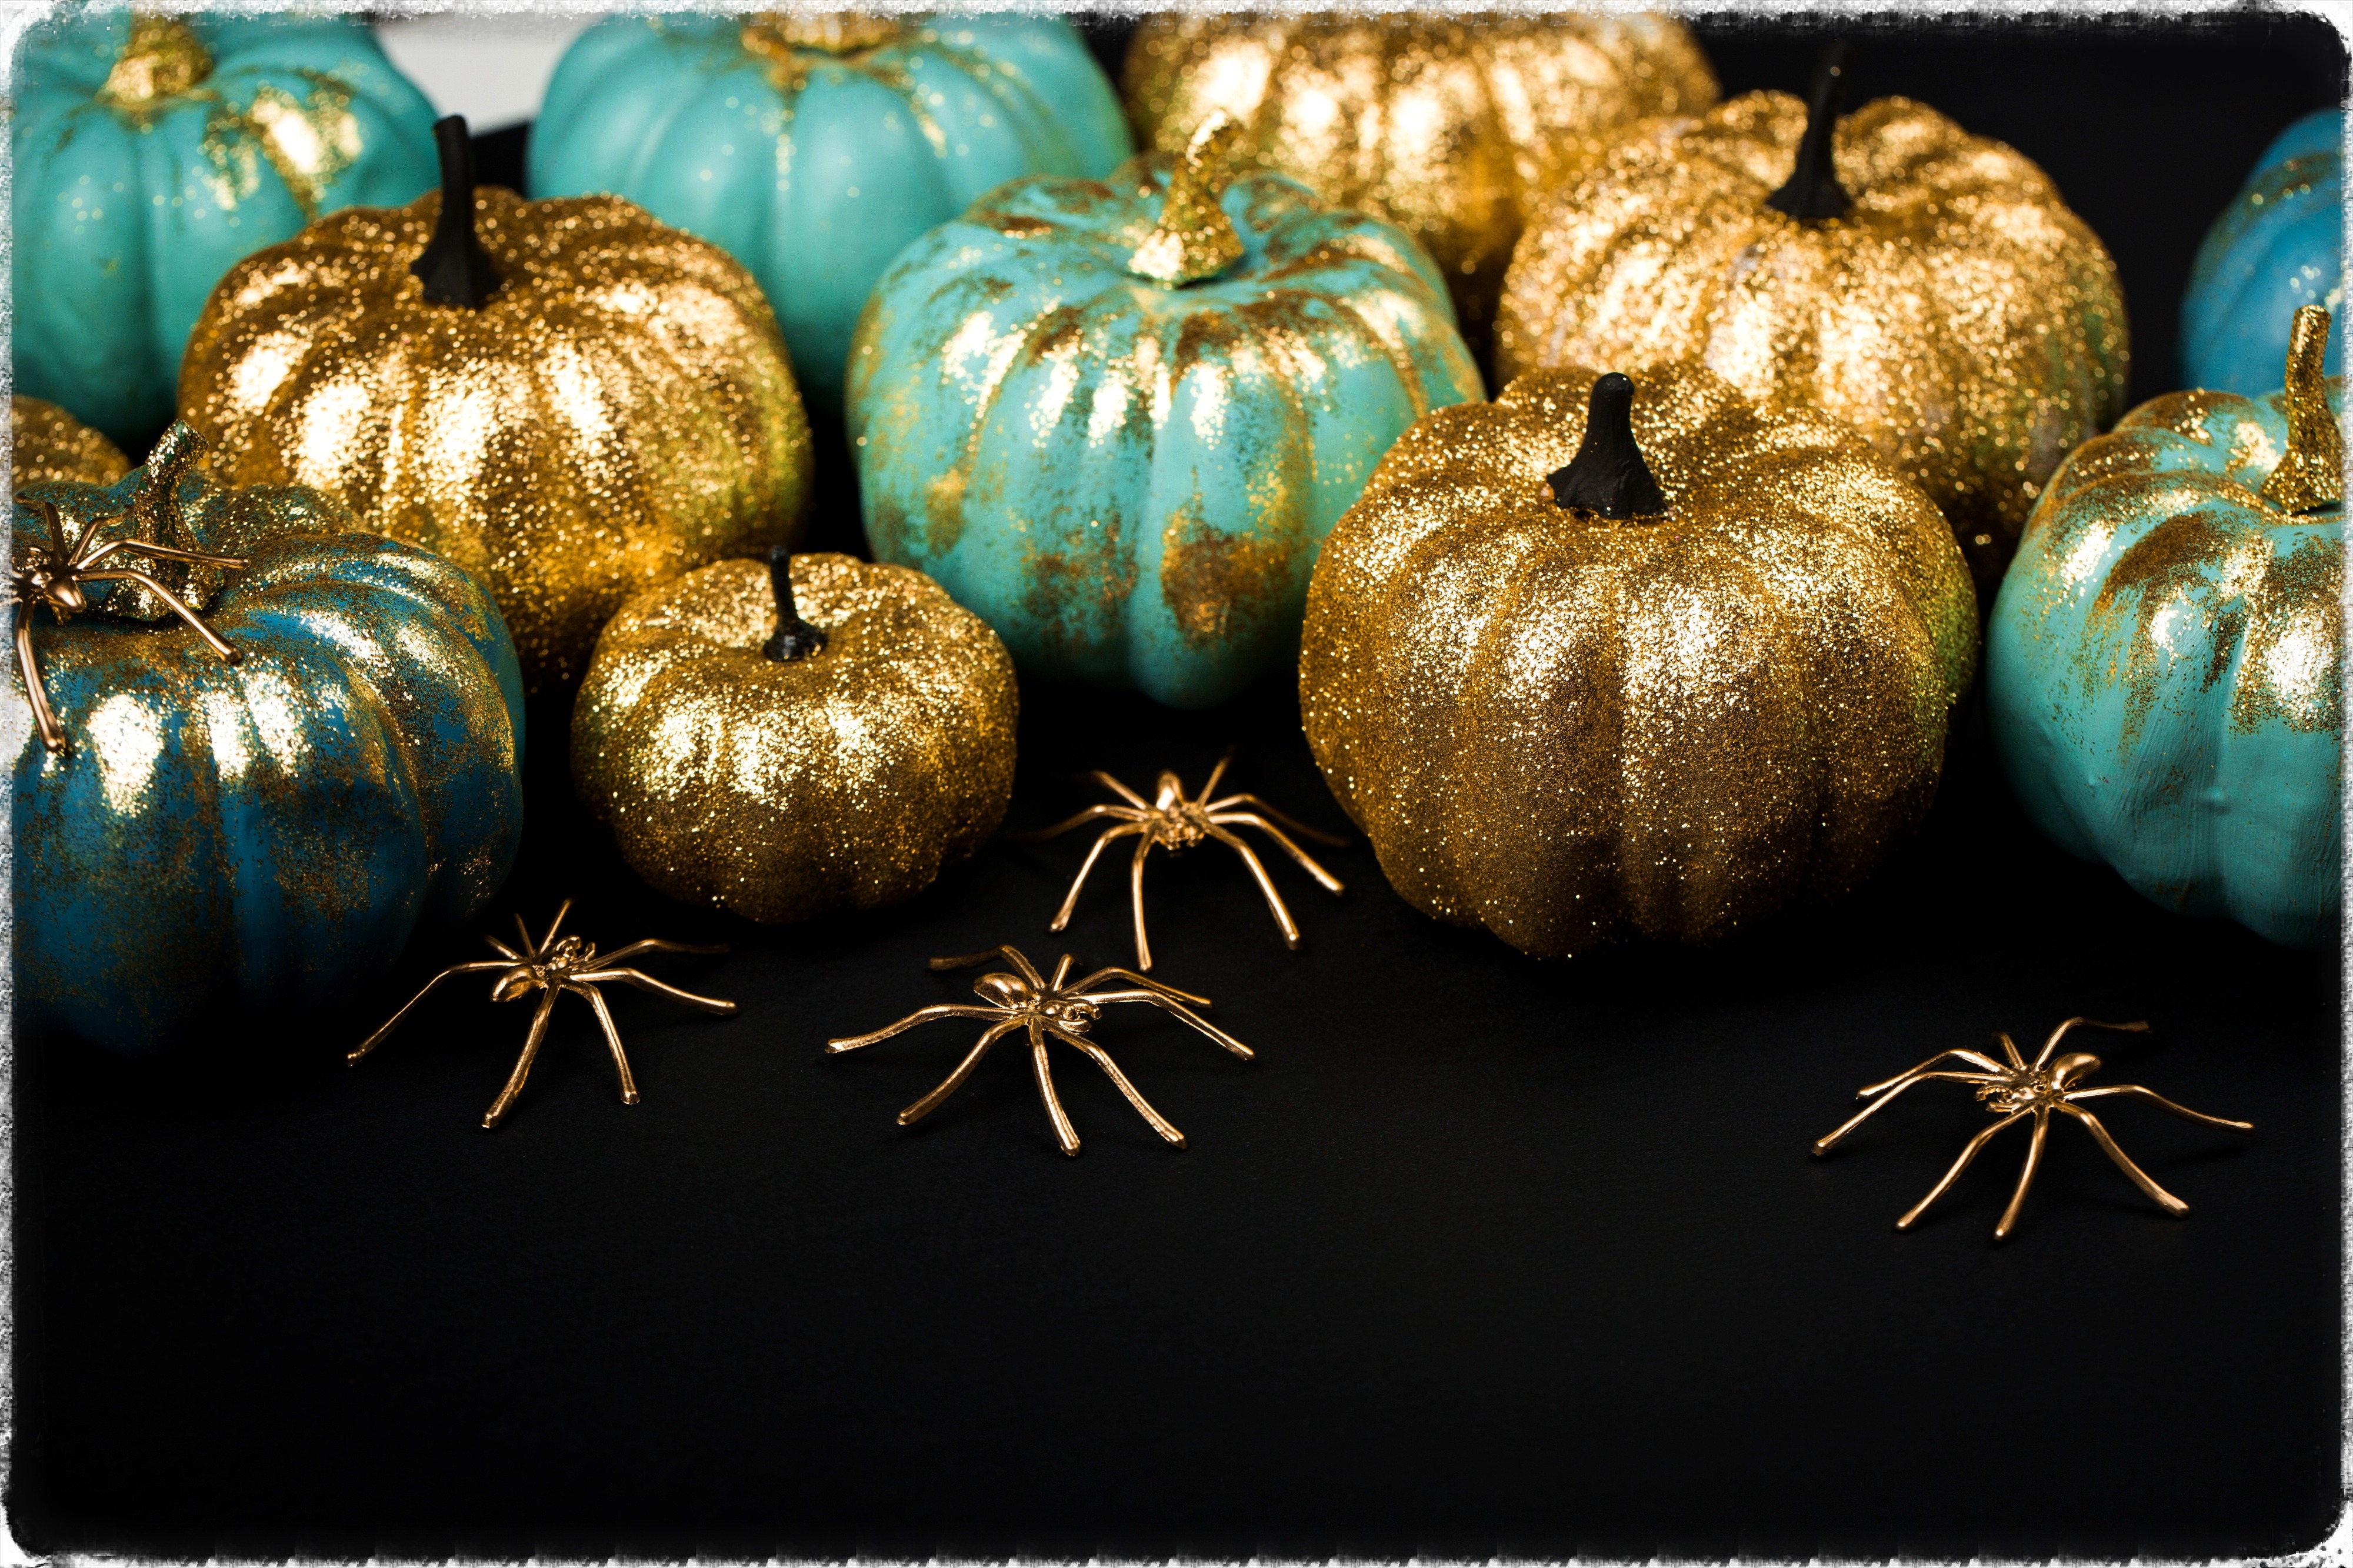
For those who love all things glitz and glamour, these glittery pumpkins are sure to sparkle up your Halloween. These beauties will add some flair to your home while remaining traditional. This is an easy craft that will give you gorgeous results, without the pain of carving. Note: it’s best to use mini pumpkins for this one!
Supplies You’ll Need
Pumpkin
Glitter Spray Paint (In Any Color)
Old Newspapers
Tinfoil
How To Craft
Step 1: Prevent things from getting too messy. Set up your supplies in your garage, basement, or outside. Make sure to put down newspapers before starting.
Step 2: Wrap the pumpkin stem in tinfoil (unless you want that to be glittery as well).
Step 3: Evenly coat the pumpkin with the glitter spray pain. You may need to do multiple layers to get full coverage.
Step 4: Make sure your pumpkin is completely dry before displaying it in your house.
Looking to add even more sparkle to your house on Halloween? These Fairy Lighted Pumpkins will do the trick!
5. Metallic Pumpkins
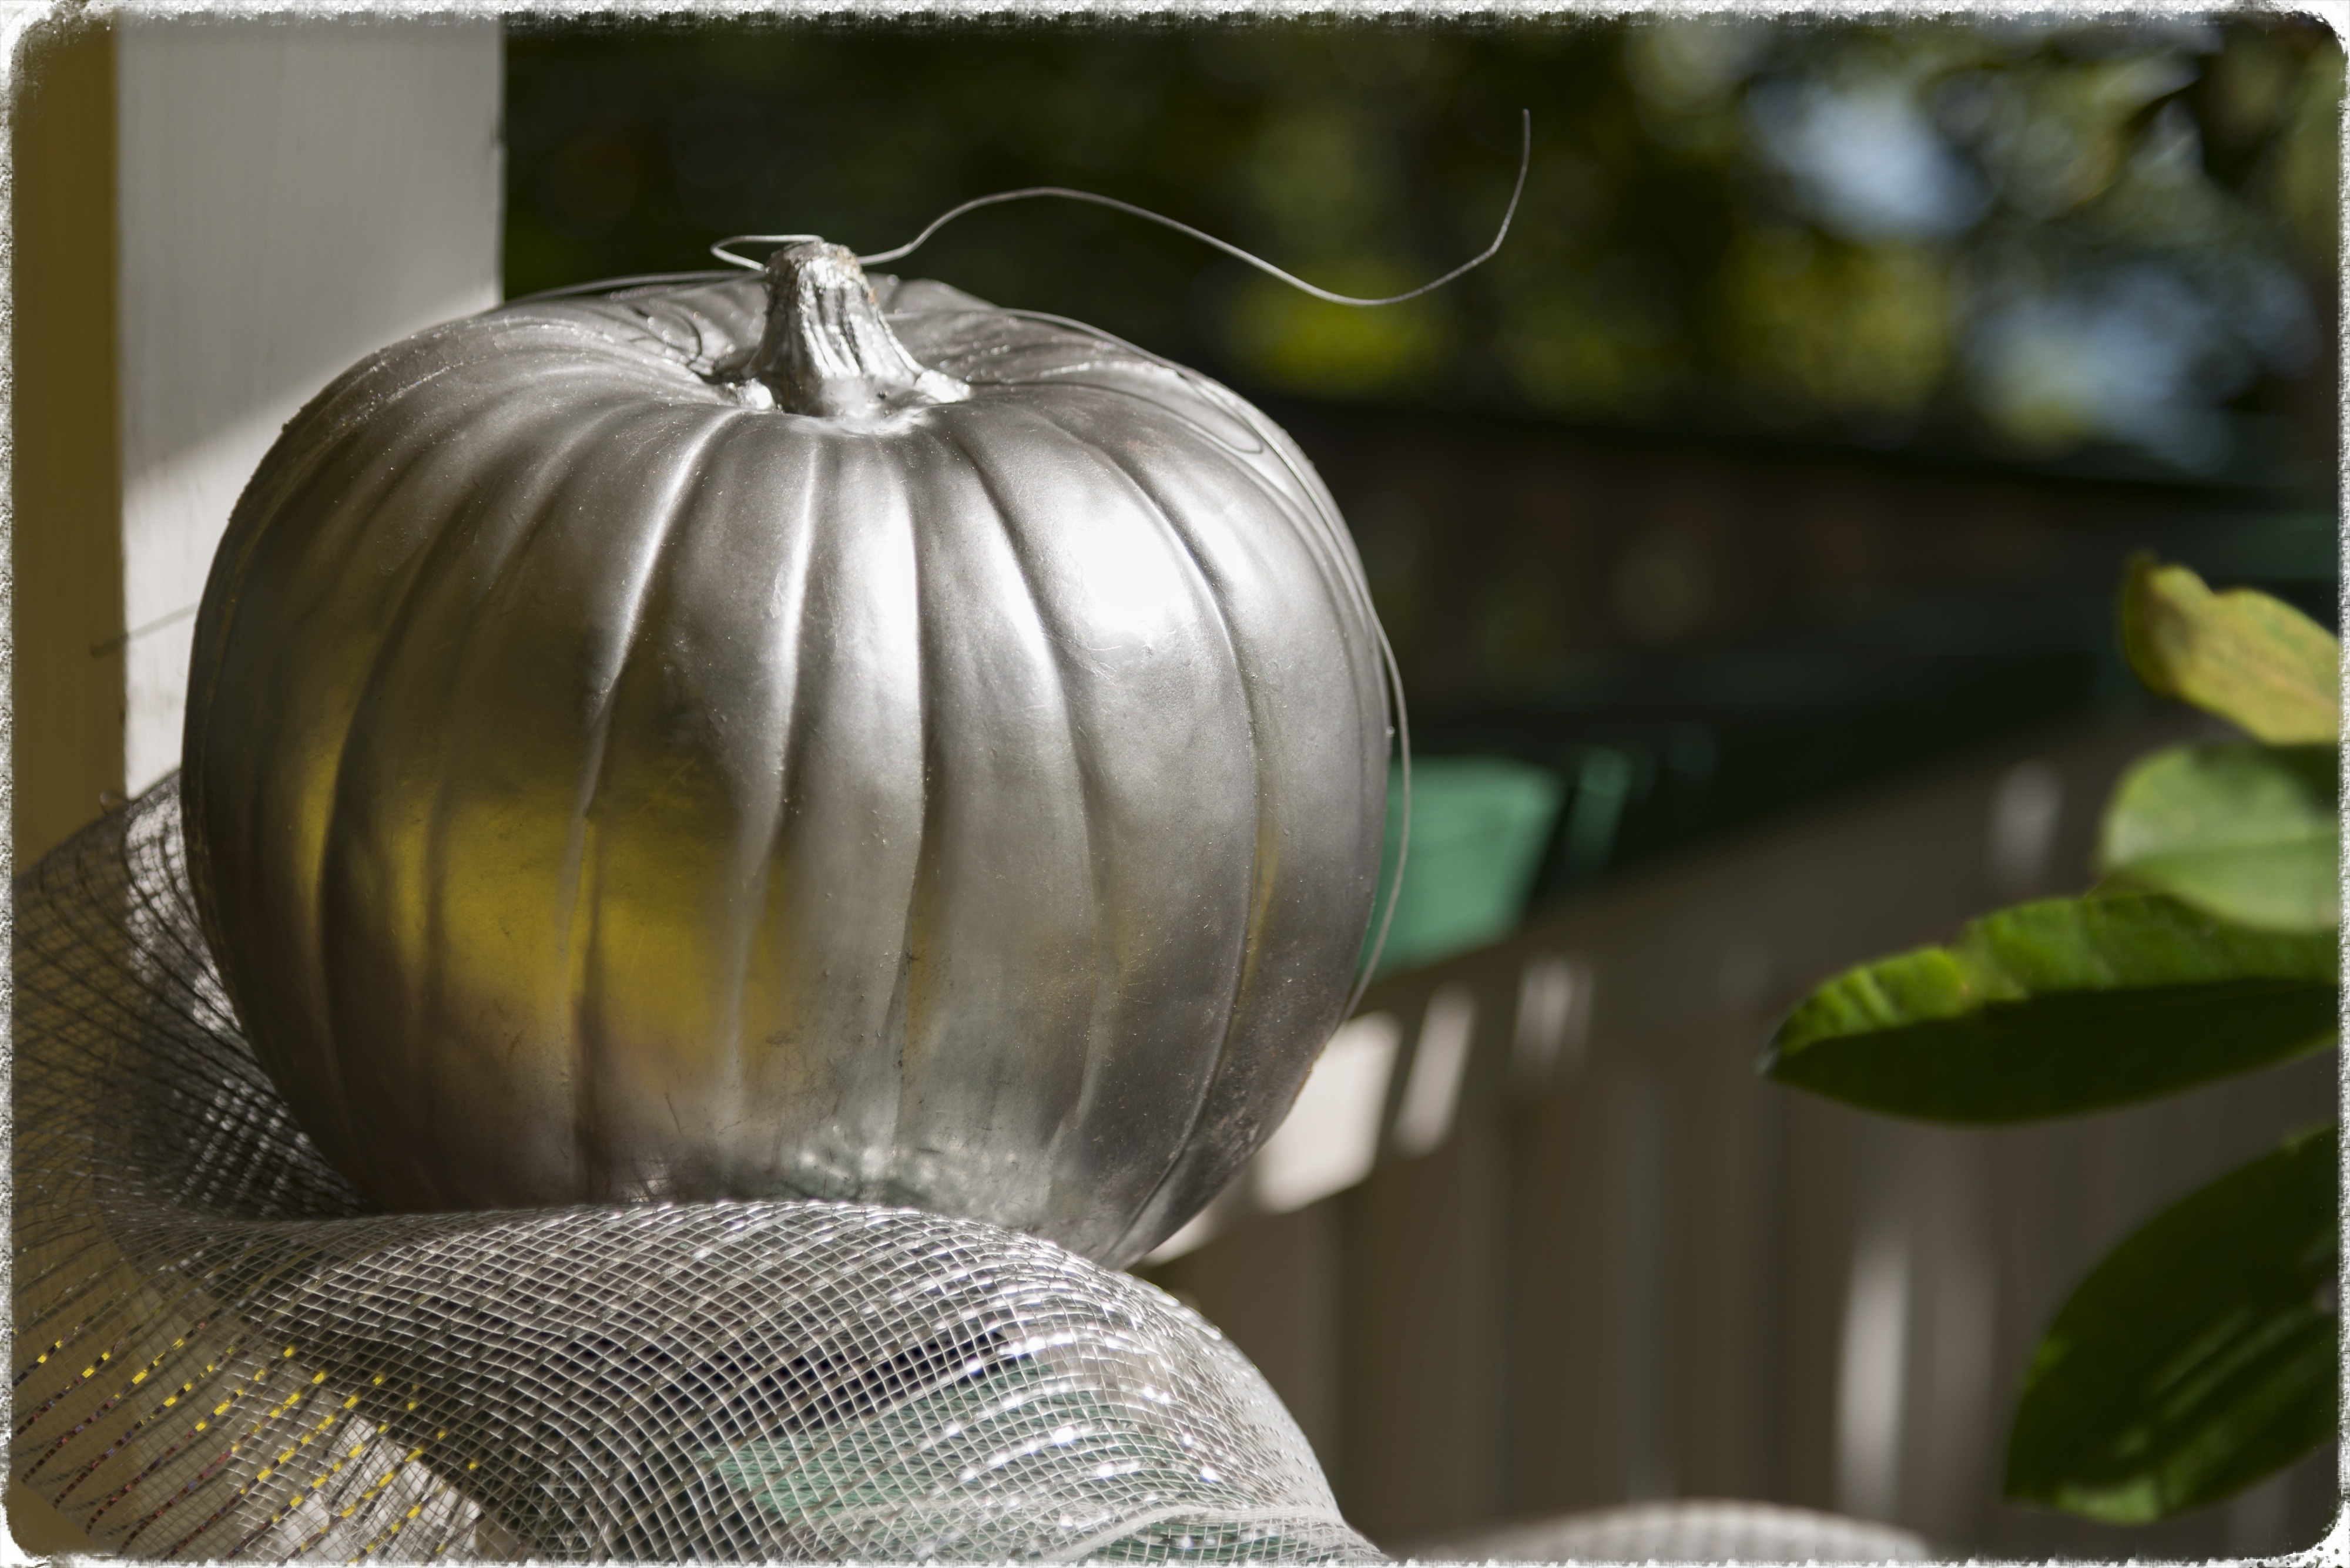
If you want to decorate a pumpkin in a sleek, simple, and sophisticated way, this metallic pumpkin craft is for you. This design would pair well with metal and wire decorations around your house.
Supplies You’ll Need
Pumpkin
Metallic Silver Spray Paint
Old Newspapers
How To Craft
Step 1: Prevent things from getting too messy. Set up your supplies in your garage, basement, or outside. Make sure to put down newspapers before starting.
Step 2: Evenly coat the pumpkin with metallic silver spray paint. Make sure you spray the stem as well.
Step 3: Make sure your pumpkin is completely dry before displaying it in your house.
Coordinate your metallic pumpkins with rustic, country decorations around your home! Look at our selection of Country Farmhouse Decor for ideas!
6. Halloween Phrase Pumpkins
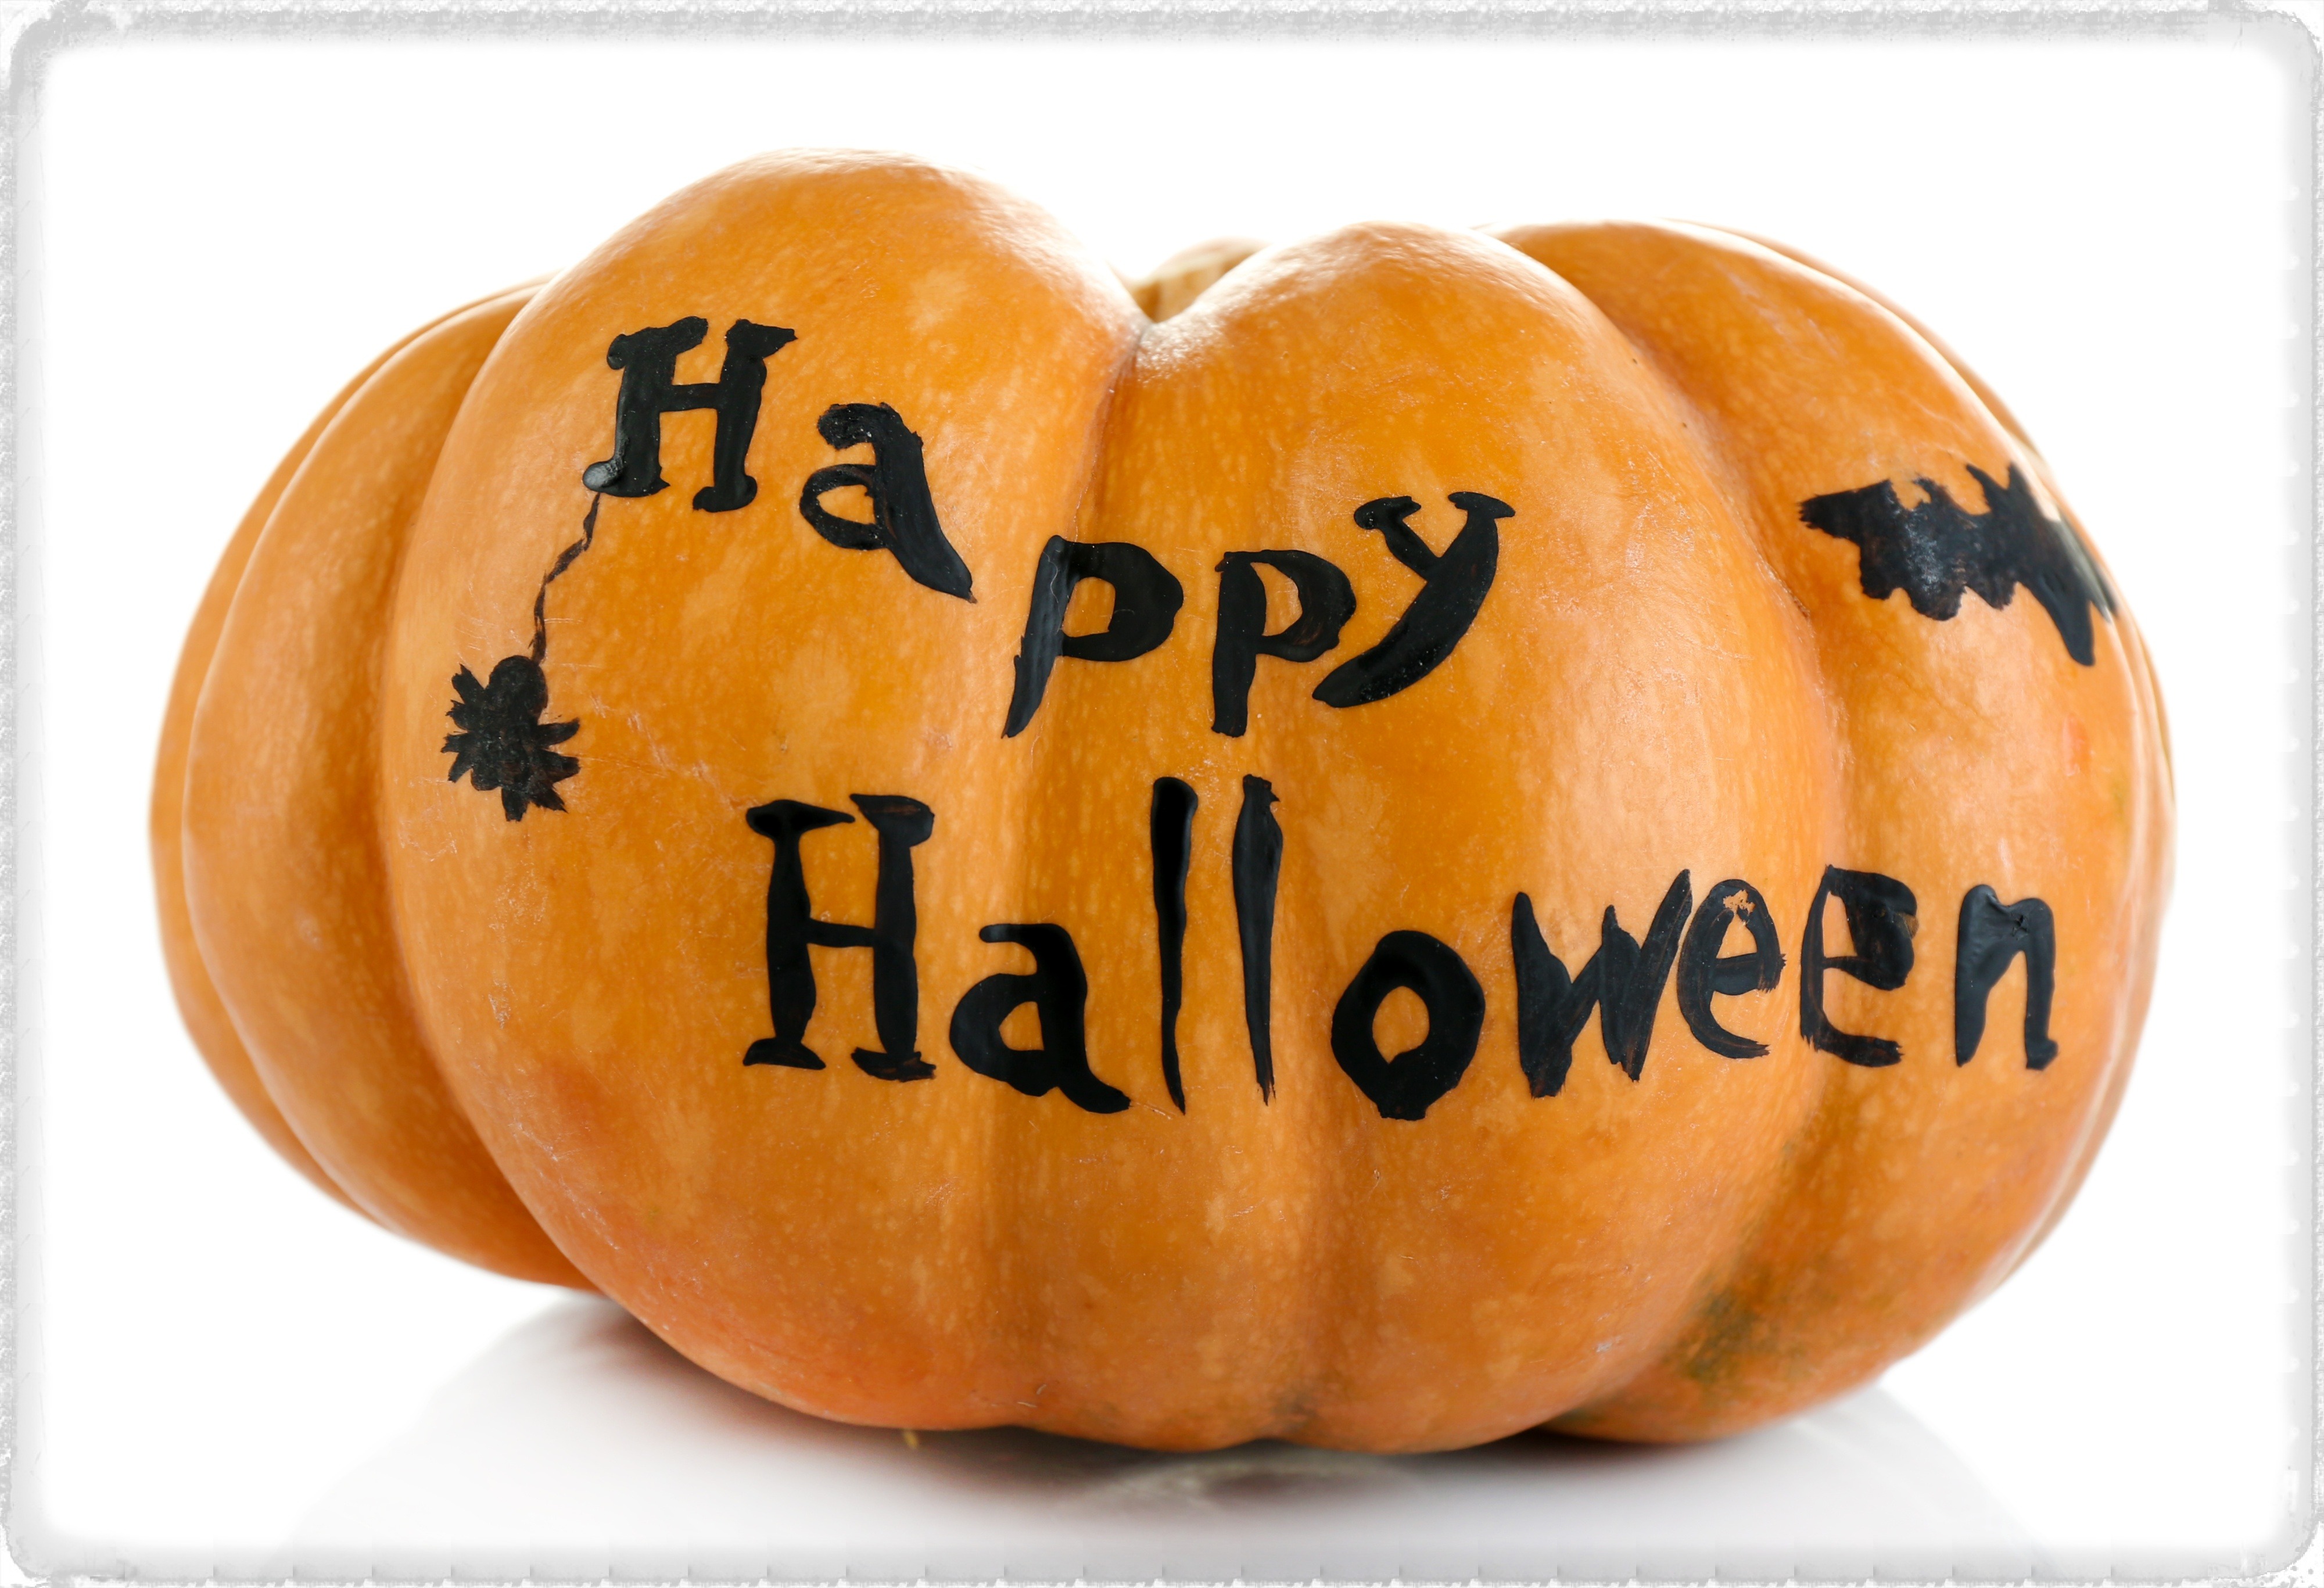
The Halloween phrase pumpkin craft is the easiest and most simple one on this list. Display your love for Halloween by producing a quick craft that will leave you with cute results. This is much less complicated than trying to carve a phrase into the pumpkin!
Supplies You’ll Need
Pumpkin
Permanent Marker (Any Color of Your Choice!)
Letter Stencil (Optional)
How To Craft
Step 1: Choose the phrase that you want on your pumpkin. It can be anything from “Happy Halloween” to “Boo!” to something more lengthy.
Step 2: If you choose to use a stencil for your lettering, do so now with the colored marker of your choice. Otherwise, simply freehand write your phrase.
Step 3: If you want to add a little more spice to your pumpkin, feel free to draw additional designs, such as spiders or bats, or anything you desire.
Step 4: Display your pumpkin outside to share Halloween greetings with everyone who passes.
If you want to incorporate even more Halloween and fall phrases into your home, check out our fall sentiment decorations.
7. Splatter Painted Pumpkins
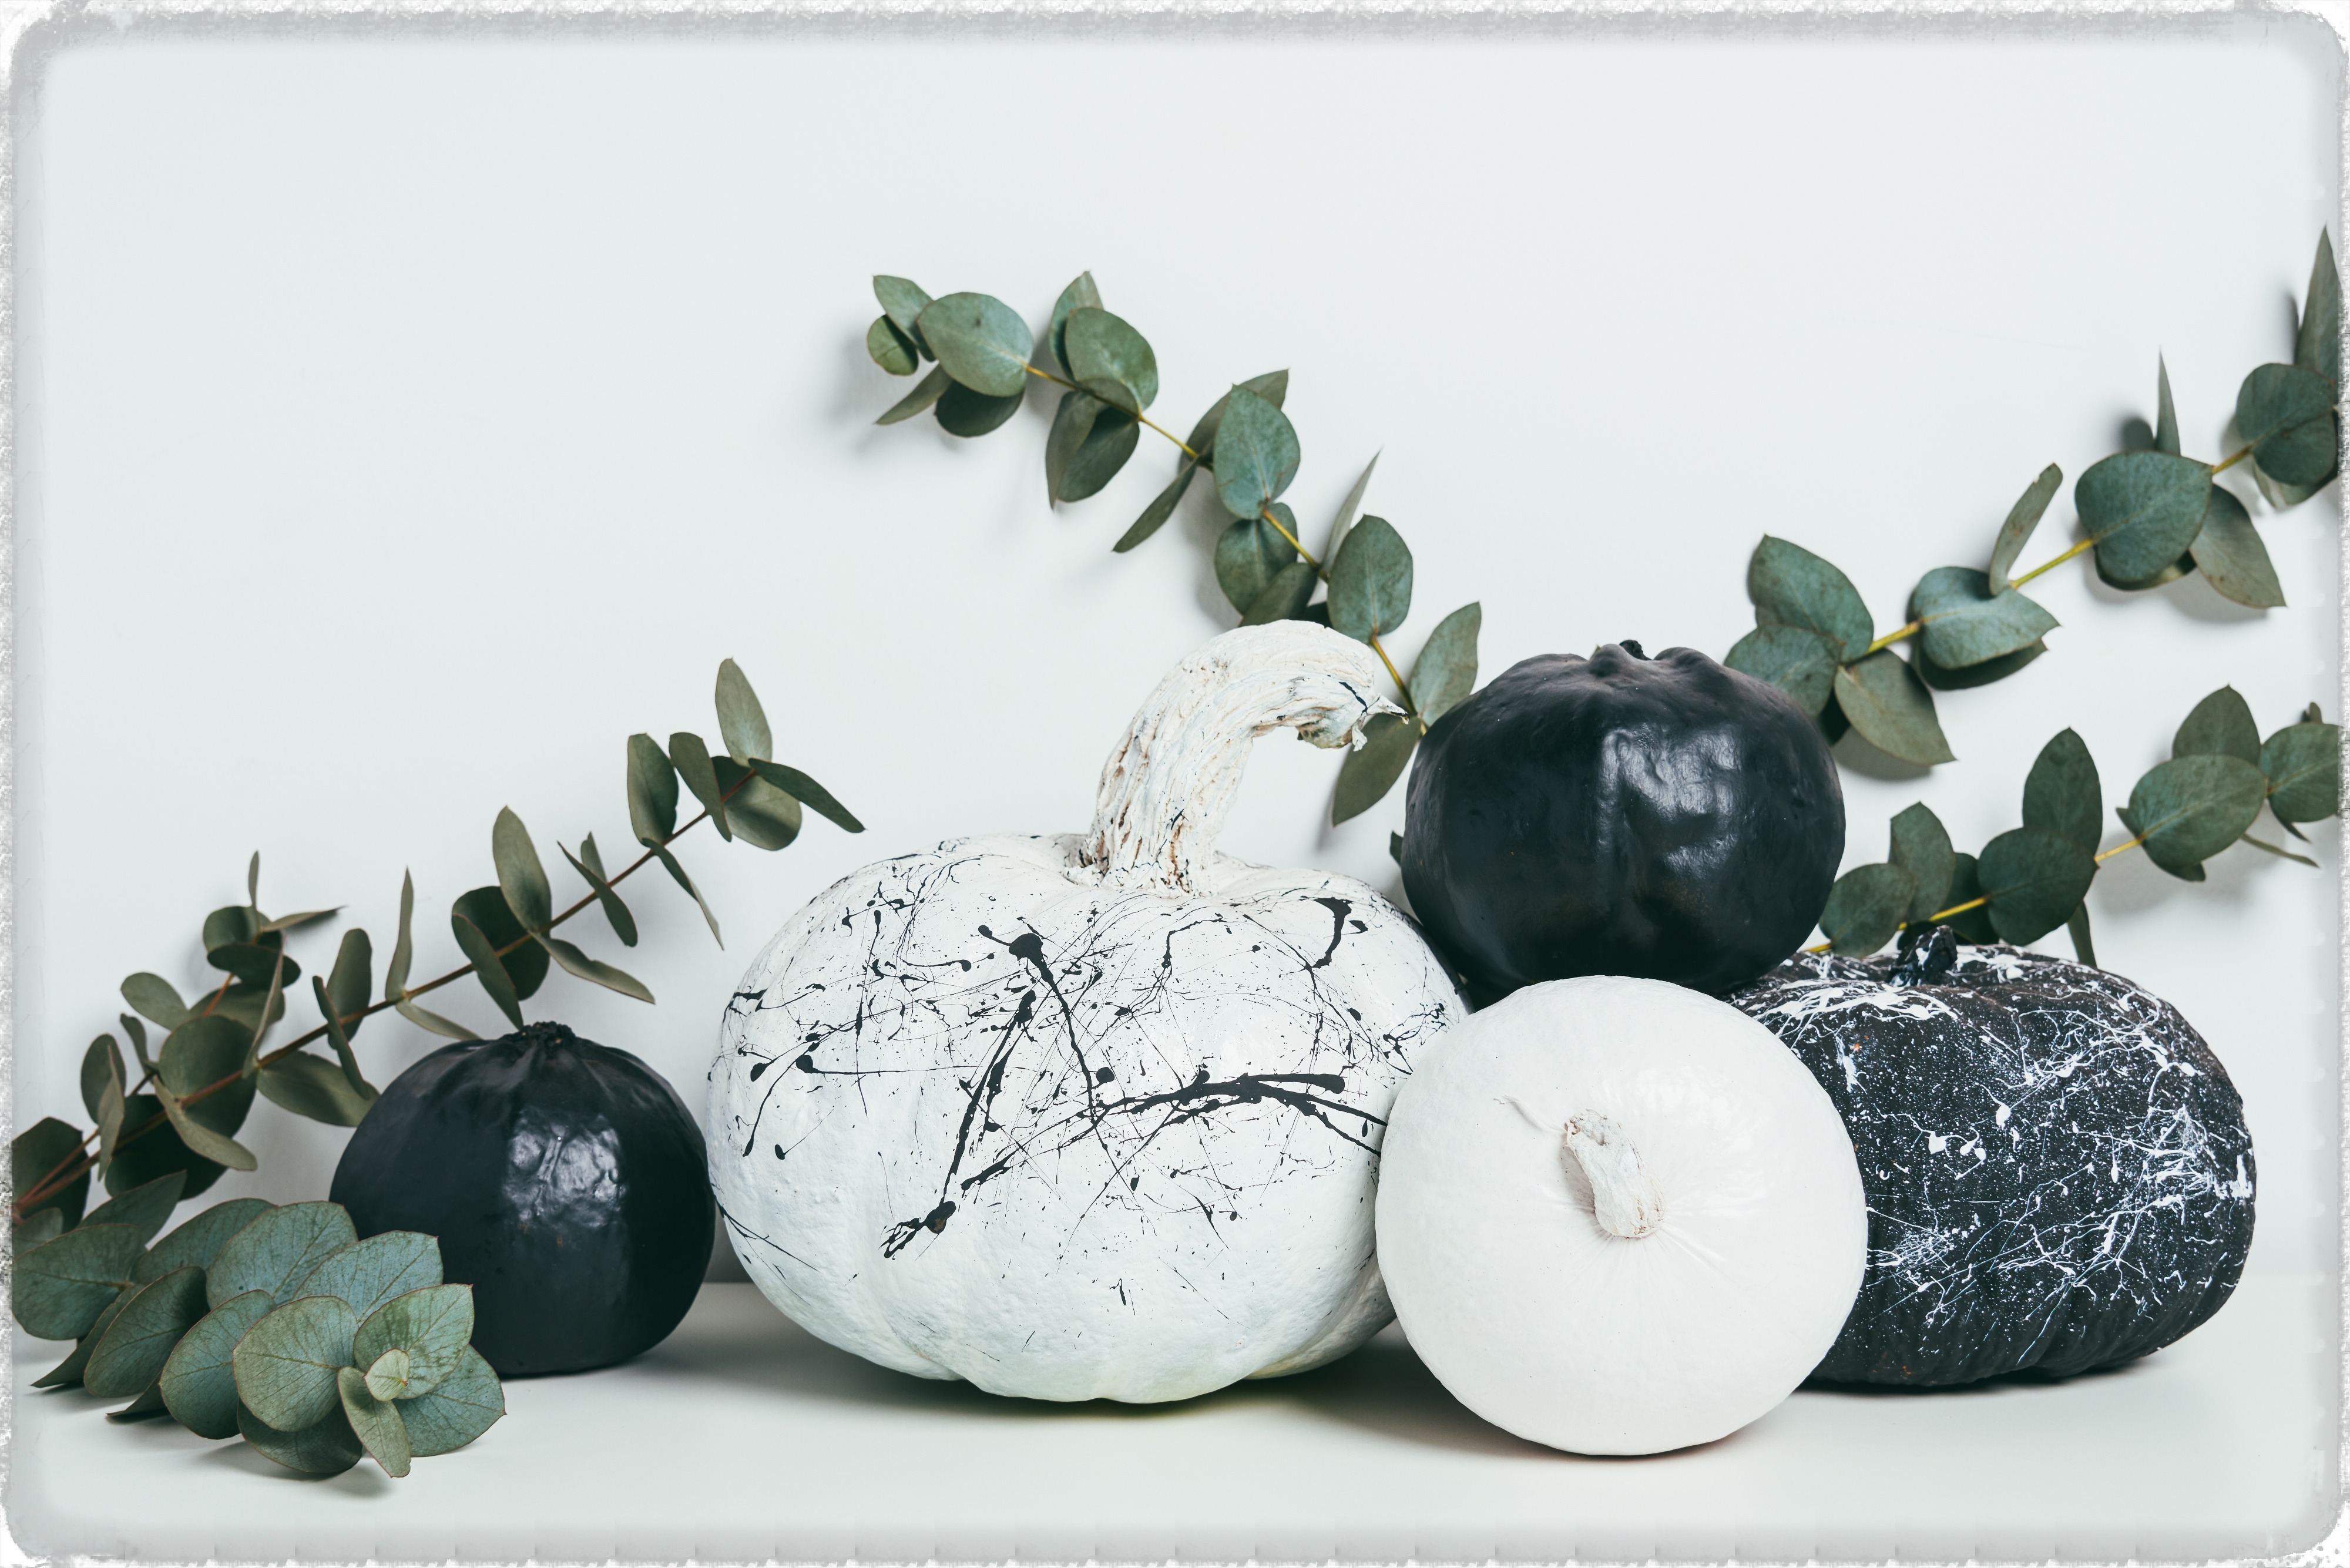
If you want to flawlessly look like an artist, these splatter painted pumpkins are ideal for you. This is an easy craft that mostly just requires the patience of drying. The black and white colors of these pumpkins make them extra classy.
Supplies You’ll Need
Pumpkin
Black and White Acrylic Paint
Foam Paintbrushes
Old Newspapers
How To Craft
Step 1: Prevent things from getting too messy. Set up your supplies in your garage, basement, or outside. Make sure to put down newspapers before starting.
Step 2: Decide on your base color and evenly coat your pumpkin (stem included) in paint. Wait for the paint to dry before continuing on to step 3.
Step 3: Dip a tiny portion of a fresh brush into the opposite color of your base. Lightly flick your wrist so the paint splatters off your brush and onto the pumpkin, creating unique and artsy lines. Repeat as many times as you like.
Step 4: Make sure your pumpkin is completely dry before displaying it.
View our selection of Halloween decorations to add even more festive spirit to your home!
Are you ready to take your Halloween decorations to the next level? Check out our August Catalog for a huge selection of Halloween and fall decor for inside and outside your house!


I shared and liked this article on decorating pumpkins for Halloween, I think these are awesome ideas for parents with small children to decorate without having to use any sharp knives
Jeff
Great idea