
5 Easy DIY Garden Decor Ideas
Flourishing plants and colorful arrays of flowers can bring life to your outdoor space, and adding decorations can elevate your space even more. Crafting your own garden decor can make your space feel more personal and fun! Here are 5 easy DIY garden decor ideas that you can create for your yard!
1. DIY Chair Planter
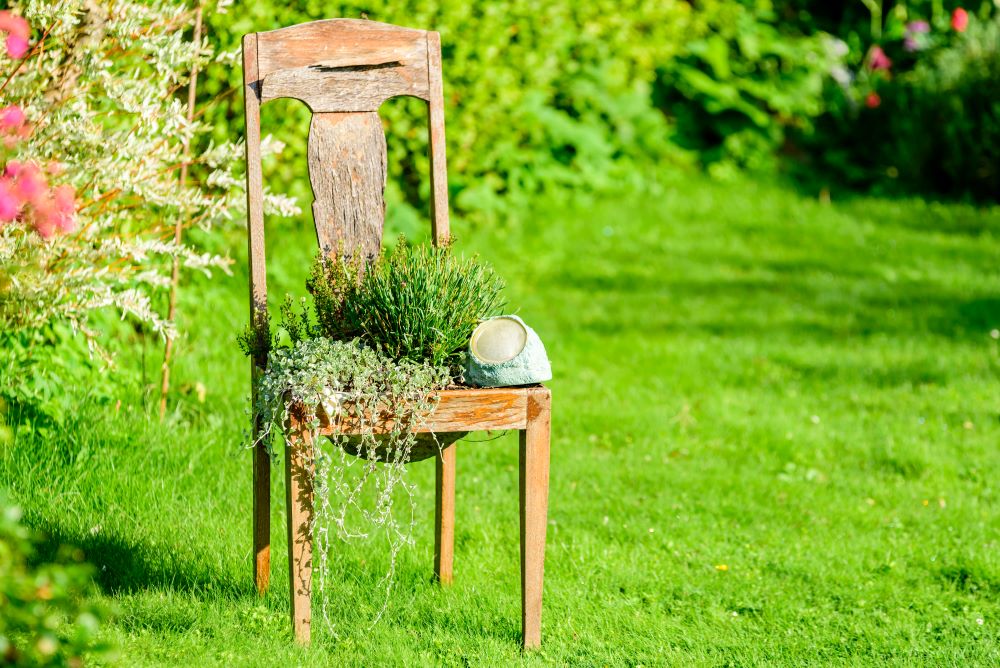
If you’re looking for a unique planter to add to your garden, this DIY chair planter is the perfect addition! With an antique and ‘outside of the box’ appearance, the chair planter is sure to stand out among your other decorations.
You can place the chair planter on your front porch or patio, or you can put it near a tree in your garden among other planters. This is an easy DIY decoration that will look beautiful in your outdoor space.
Supplies Needed
Antique Chair
Drill
Sandpaper
Spray Paint (Any Color)
Round Planter
Flowers & Soil
Instructions
Step 1: Measure the circumference of your planter, then outline the hole you’ll need to drill out on your chair’s seat. Make sure it’ll be big enough for the planter to fit inside of, but small enough for it to sit inside without falling through.
Step 2: Carefully drill your hole in the seat of the chair and then use sandpaper to sand down any rough edges.
Step 3: Spray paint your chair in any color of your choosing.
Step 4: Place your planter inside of it with your soil and flowers. You now have a unique decoration for your front porch or backyard garden!
2. DIY Mosaic Stepping Stone
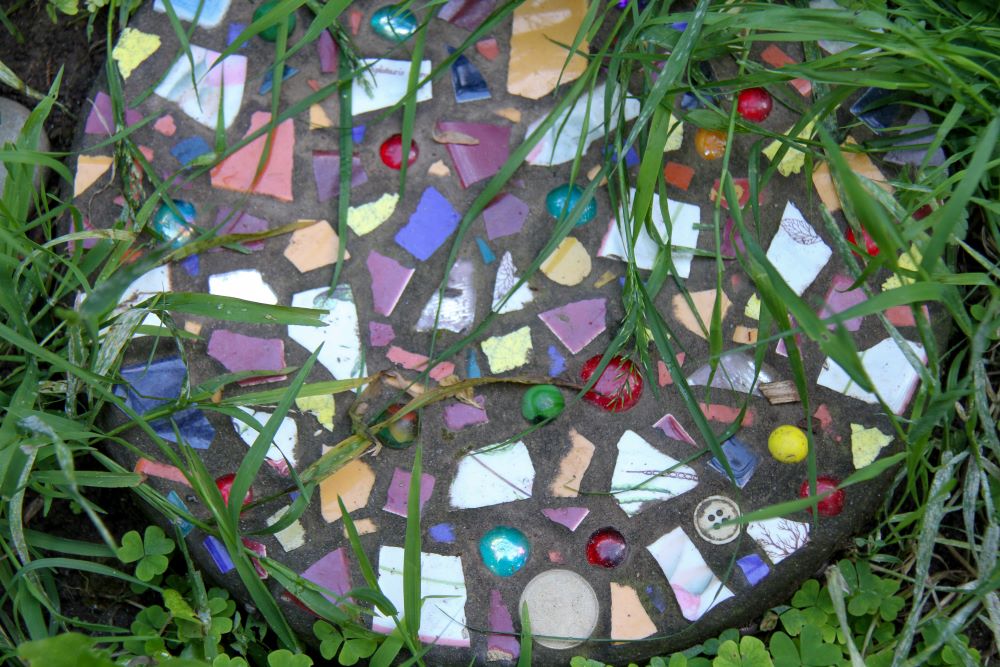
This mosaic stepping stone is a colorful collage that will look stunning among your plants and flowers. This DIY project is truly unique to you and your design style; you can make the stone look however you want!
Craft more than one stone to create a pathway to your garden or make one to use in the center of a selection of plants and flowers.
Supplies Needed
Non-stick Cake Pan (Round, or Any Shape)
Vaseline
Contact Paper
Old Plates (From Thrift Store)
Glass Gems
Concrete
Marine Varnish
Chicken Wire
Safety Glasses
Rubber Gloves
Dust Mask
Hammer
Bucket
Trowel
Instructions
Step 1: The first step is to break your plates. Make sure to put on your safety glasses before you do this! Cover a plate with a sheet or towel and hammer it to pieces. It’s best to do this outside in the grass.
Step 2: Continue to smash your plates until you have a good mix of sizes.
Step 3: Trace your pan on top of the contact paper and cut out the contact paper circle.
Step 4: Remove the backing of your contact paper and carefully place it inside your pan with the sticky side up.
Step 5: Now is the fun part! Start adding your plate pieces and glass gems in the design that you want. Make sure to place each piece face down and firmly press them down into the contact paper. Note: leave a small amount of space in between each piece to leave room for the concrete later.
Step 6: Next, prepare your concrete by following the directions on the bag. Make sure you put on your dust mask for this step.
Step 7: Before you start adding the concrete, prepare a square piece of chicken wire. Make sure it’ll fit inside of the circle nicely. This will provide extra support and strength for your stepping stone. Set aside. Tip: prep your cake pan by spreading Vaseline on the inside rim. This will make it easier to remove the stone later.
Step 8: Put on your rubber gloves. Scoop a layer of concrete on top of your stepping stone in the cake pan. Make sure you smooth it out evenly, creating a 1-inch layer.
Step 9: Gently push your square of chicken wire on top of the first layer of concrete.
Step 10: Add another 1-inch layer of concrete on top. Let it sit for 2 days.
Step 11: Carefully take out your stepping stone by turning it over and tapping on the bottom of the pan. Then, carefully remove the contact paper.
Step 12: Lastly, brush on marine varnish to finish it off. You now have a beautiful stone for your garden!
3. DIY Tin Can Lanterns

Instead of using traditional string lights or regular lanterns in your garden, consider making these tin can lanterns to provide a magical glow in your yard at night and an interesting decoration during the day!
Make a multitude of different colored tin can lanterns to hang up in your yard to get the true effect of this rustic decoration.
Supplies Needed
Tin Pails (With Handles)
Hammer
Nail
Spray Paint (Any Color)
Tea Lights or Small LED Candles
Instructions
Step 1: Using your hammer and nail, punch out holes around your pail. You can choose to do a planned pattern (such as a heart) or freehand it.
Step 2: Once you have all your holes punched out, it’s time to spray paint. You can do any color you want. If you’re doing more than one pail, make them each unique by spraying each one a different color.
Step 3: Let the paint dry thoroughly.
Step 4: Insert tea lights or mini LED candles inside and hang up in your garden. You now have a magically lit up fairyland!
4. DIY Tire Planter
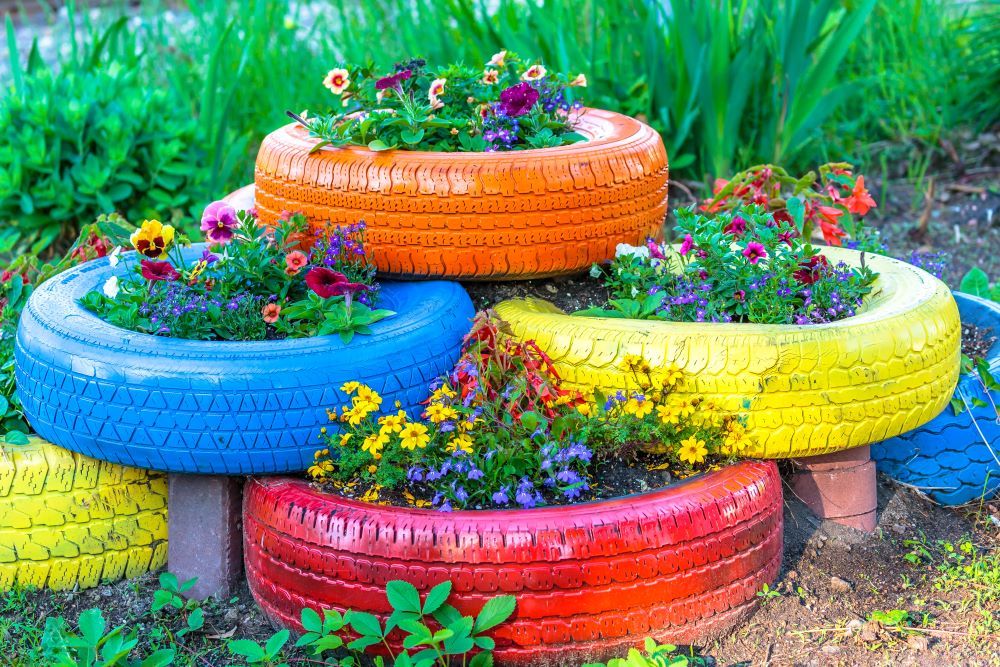
These car tire planters will add pizzazz and color to your yard and garden! They’ll provide a perfect sized home for your selection of flowers and plants.
This specific DIY suggests the use of a wood plank platform – this is helpful if you wish to move your tire planter around your yard. However, you can choose to put your planter right on top of the ground if you plan on keeping it in the same place all season long.
Supplies Needed
Car Tire
Spray Paint Primer
Spray Paint
Wood Planks (For Platform)
Garbage Bag
Flowers & Soil
Instructions
Step 1: Prep your tire by spraying a coat of primer on top. Let dry according to can’s instructions.
Step 2: Spray paint the tire with any color of your choice. Note: it’s a good idea to use a bright color because it’ll stand out more.
Step 3: While you let your paint dry, it’s time to make a platform for your tire planter. Make a simple platform by nailing together wood planks. Make sure there is some space between the planks to allow for drainage. The platform doesn’t need to look pretty; it won’t be visible.
Step 4: Find a spot in your yard for the tire planter and place it on top of the plank platform.
Step 5: Create a layer between the tire and platform with a garbage bag. Make sure to put holes in the garbage bag to allow for drainage.
Step 6: Finally, add in your soil and plants!
5. DIY Painted Garden Rocks
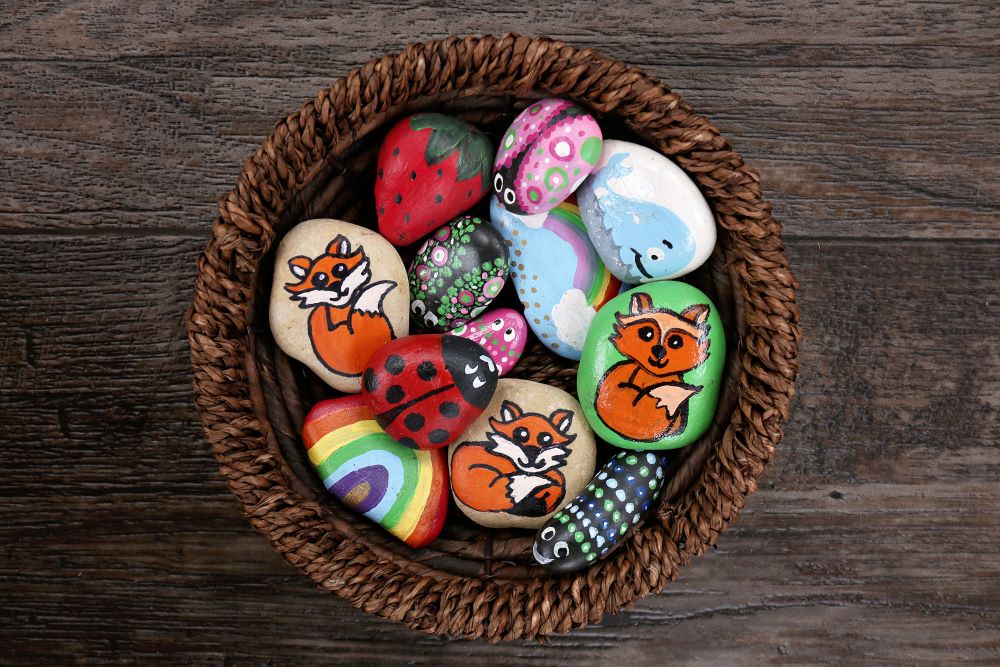
Let your inner artist shine through with these fun painted garden rocks! This is a project that the whole family can do together; let your kids design their own rocks to display in your garden.
Show off your rocks by putting them on top of your backyard table, on top of the soil underneath a tree, or inside of a planter in between flowers and plants.
Supplies Needed
Rocks (From Craft Store or Outside)
Clear Sealer
Multi-Surface Paint
Variety of Paintbrushes
Oil-Based Paint Pens
Outdoor Mod Podge
Instructions
Step 1: Choose a selection of rocks that are flat and smooth. It may be easier to get these at a craft store rather than searching for them outside. Make sure to wash your rocks and dry them completely before painting.
Step 2: Start by using a clear sealer spray on the rocks to help prep for the paint.
Step 3: Using an outdoor paint or oil-based paint pens, paint on your desired design. Depending on what your vision is, it may be easier to use paint pens for intricate details and paint for the overall color of the rock. Tip: use stencils to create accurate designs such as animals and bugs.
Step 4: Once your paint dries, protect your artwork by using outdoor Mod Podge.
Are you looking to decorate your garden even more this spring? Shop our selection of planters, outdoor decor, solar lighting, live flowers, and more!


