
5 DIY Wood Craft Projects For Home Decor
If you’re into crafting and DIY-ing, you already know that wood is a great material that can be used for a large variety of projects. There are so many possibilities of the things you can make using different types of wood. Wood crafts can also make great decorations for your house because they can add a rustic and charming element to any room. Here are 5 DIY wood craft projects that you can use as home decor.
DIY Rustic Wood Planter Box

This DIY rustic wood planter box can be a charming addition to your country or farmhouse themed living room or kitchen! This is a great indoor planter for your home but it can also be used outside if you want to.
If you have pieces of distressed wood lying around, that works best to achieve the rustic look in this craft; however fresh pieces of wood will work just as well. If you choose fresh wood, sand it down or add some stain on it to give it a natural distressed look.
Supplies Needed
3 Long Pieces Of Wood (About 2 Feet Long)
2 Short Pieces Of Wood (For The Ends)
L Brackets And Screws
Drill
Saw
Hammer
Dried Coconut Husks
Instructions
Step 1: Cut the long pieces of wood with a saw to make sure they all match in size. These pieces will make the sides and base of your box. Note: we suggested 2-foot long pieces of wood but feel free to make your box as small or large as you want.
Step 2: Next, cut and adjust your shorter pieces of wood to make sure they’ll fit in between the bottom and sides of the box.
Step 3: Drill in L brackets around the box to secure the wood pieces together. The amount of brackets depends on the size of your box. Note: make sure to drill the brackets into the corners and sides of your box.
Step 4: Evenly place dried coconut husks along the bottom of the box before putting in soil and plants. The husks will help absorb water and prevent leaks through the bottom of the box.
Check out our Planters & Gardening Supplies for more flower and plant inspiration!
DIY Decorative Wood Tray
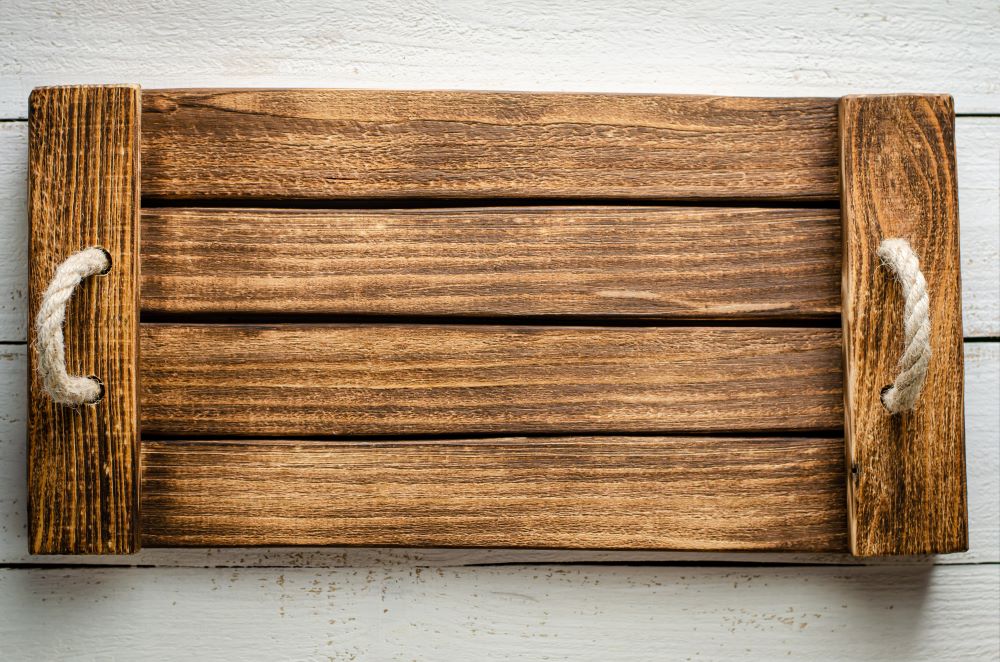
This DIY decorative wood tray will make the perfect addition to your coffee table or can even be a nice centerpiece on your kitchen table! Put some small accents on top of it or a beautiful vase of fresh flowers.
While this craft uses rope handles, you can also substitute them for any decorative handles of your choosing.
Supplies Needed
1 x 4 x 8 Furring Strip
1 x 3 x 8 Furring Strip
Heavy Duty Jute Rope
Wood Glue
Nail Gun
Wood Stain (Any)
Drill
Saw
Instructions
Step 1: Start by cutting your wood strips. You’re going to want 4 wood strips (the 1 x 4 x 8 strips) to be 19″ in height and 2 wood strips (the 1 x 3 x 8 strips) to be 14″ in height.
Step 2: Evenly line up your 4 wood strips to create the surface of your tray.
Step 3: Use wood glue on each side of your surface and carefully set down your 2 wood strips on top.
Step 4: Using a nail gun, nail down the 2 wood strips. Tip: use 1 1/4″ brad nails.
Step 5: Now it’s time to make the holes for the rope handles. Evenly measure and mark where you want the rope handles to be on each top wood strip. Drill holes into the marks you made – you’ll put the handles on last.
Step 6: Cover every inch of the tray with the wood stain of your choice. Let it dry completely.
Step 7: Now it’s time to cut your rope handles. Each rope handle should be cut into a 20″ section.
Step 8: Place the rope handles through your drilled holes and secure them with sturdy knots. Display it anywhere you want!
Looking for unique decorations to put on top of your tray? Check out our selection of Decorative Accents!
DIY Wood Crate Shelves
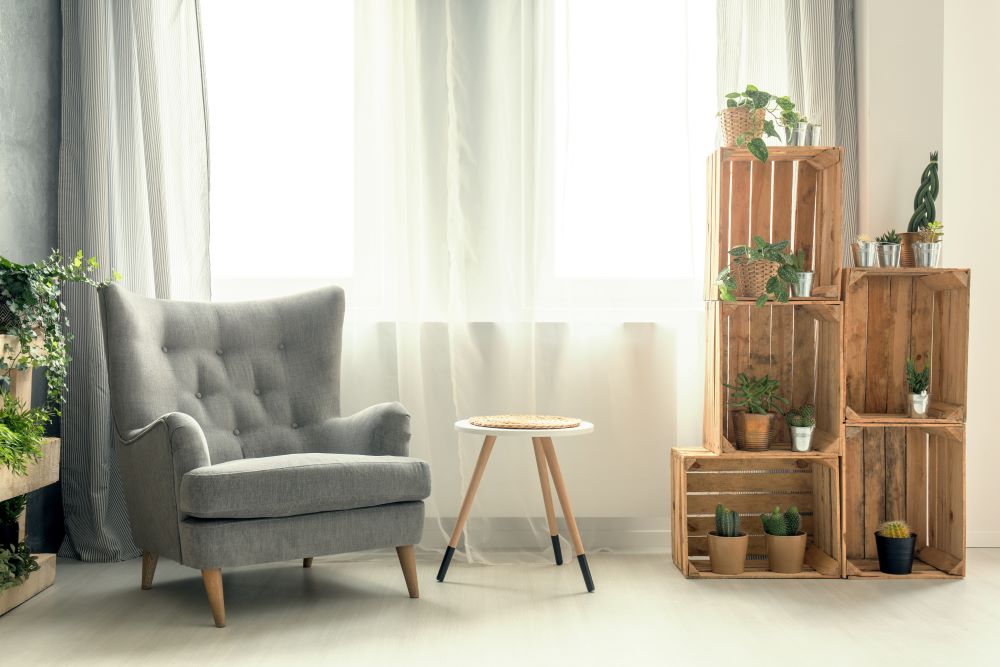
These DIY wood crate shelves are perfect for displaying plants, storing books, or for keeping any other small items organized! This pairs especially well with the farmhouse decor style.
With this project, you can choose the amount of crates you want to use based on how tall and big you want your shelving unit to be. You can easily find crates at most craft stores.
Supplies Needed
5-8 Unfinished Wood Crates (Any Size)
Sander Or Sandpaper
Sponge Brushes
Wood Stain (946 ml Can – Any Color)
Drill
1-inch Screws
Instructions
Step 1: Start by sanding down the crates. You’ll want to make them as smooth as possible, but leaving them a little rough will give them a more rustic appeal.
Step 2: Brush the wood stain onto the crates, making sure to cover them completely.
Step 3: Once you’re doing with the stain, wipe the crates down with a rag. Then, let them dry for up to 8 hours.
Step 4: Now you can start to screw your crates together with a drill. You can choose to make the crates as aligned and even as possible, or you could go for a purposely misaligned appearance.
Step 5: Make sure to drill in the screw towards the back of the crates where they won’t be highly visible. Once you’re done, drill in some extra screws in areas that need more support.
Step 6: Place it against the wall in any room!
Start filling up your crate shelves with books and more! Check out our Books, Crafts & Office supplies for inspiration.
DIY Wood Framed Mirror
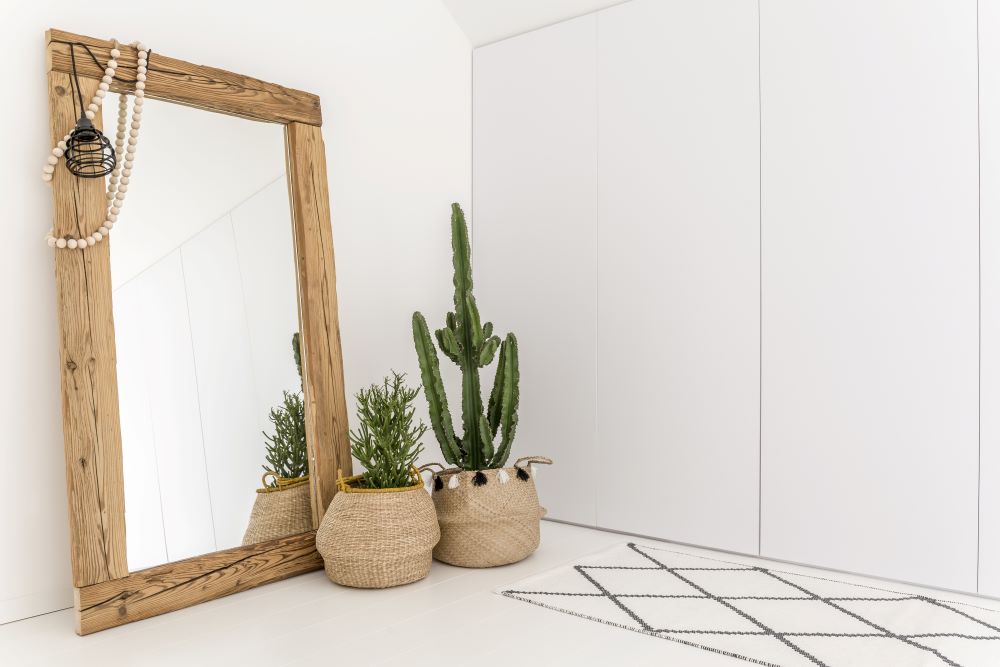
The DIY wood frame adds a unique rustic look to a simple mirror. Mirrors not only make a small room look bigger, but they also double as a decorative and functional piece in any room.
You can use any size mirror that you’d like – just make sure to adjust your measurements according the to instructions. You can also either hang the mirror up or place it on counter top and lean it against the wall.
Supplies Needed
Mirror Without A Frame
1″ x 6″ Pine (Amount Depends On Mirror Size)
1/4″ Plywood (Amount Depends On Mirror Size)
1 1/4″ Pocket Hole Screws
Fine-Grit Sandpaper
Clear Silicone Adhesive
Heavy Duty Construction Adhesive
Wood Stain & Finish (Any)
Heavy Duty D-rings
Miter Saw
Pocket Hole Jig
Drill
Brad Nailer
Instructions
Step 1: Lay out your pieces of pine onto the mirror and cut each piece to fit around the mirror evenly.
Step 2: Using a pocket hole jig, drill pocket holes at the end of each piece of pine. Then, secure the frame together with pocket hole screws.
Step 3: Smooth out the pine with fine-grit sandpaper. Make sure to get every inch of the frame so there are no rough spots left.
Step 4: Stain and finish the frame. You can use any color stain of your choosing, along with any finish you would like.
Step 5: Now it’s time to create the back of your framed mirror with the plywood. Cut your plywood to line up with your frame. Make sure it’s about 1/2″ smaller on each side so it will stay hidden behind the frame.
Step 6: Using clear silicone adhesive, adhere the mirror onto the center of the plywood. Once secured, apply weight on top with the help of heavy books. Refer to your adhesive bottle for amount of drying time.
Step 7: Attach the frame to the backing with heavy duty construction adhesive. Apply weight again with heavy books and let dry according to adhesive instructions.
Step 8: Next, use a brad nailer to put nails into the back of the frame.
Step 9: Finally, screw the D-rings into the back of the mirror and hang up on the wall. You can also choose to put the mirror on a dresser or table and lean it against the wall.
View our wide selection of home decor to find unique decorations that will coordinate nicely with your wood framed mirror!
DIY Birch Bark Candle Holder
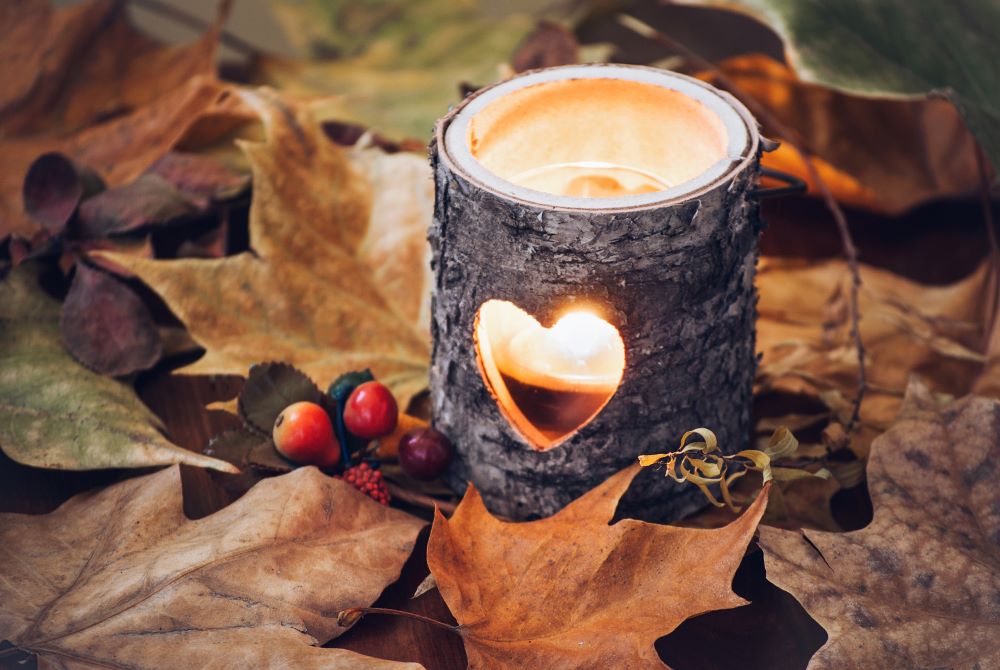
Bring some rustic charm into your living room with these adorable DIY birch bark candle holders! These are great decorations for any time of year, but they look especially nice in the fall time.
Since these are fairly simple to make, it’ll be easy to craft a bunch of them to put in different rooms of your house.
Supplies Needed
Natural Birch Bark
Clear Glass Jar
Glue Gun
Craft Knife
Instructions
Step 1: Measure your glass jar and cut the birch bark accordingly so it will wrap around the jar and match the height of it.
Step 2: Using the craft knife, cut out a heart shape in the center of the bark. You can also choose a different shape or design based on your personal style.
Step 3: Wet the bark with hot water and wrap it around the jar. Secure it with rubber bands and let it dry overnight.
Step 4: Once dry, remove the rubber bands. The dry bark is now molded into the shape of the jar.
Step 5: Realign the bark around the jar if needed. Then, glue gun the ends of the bark together on the back of the jar. Let dry.
Step 6: Put a tea light or LED candle inside of the jar and display it in your house!
Check out our candles section to find LED candles that you can use in your birch bark candle holder!
Our February 2020 catalog has everything you need to get ready for spring! From Easter decor to live flowers to spring accents and more, explore over 160 new items! Shop here.


Love these
DIY Wood Framed Mirror is a great addition to your room and I can do it during this pandemic.