5 Easy Easter Crafts For Kids
Decorating Easter eggs is the main traditional craft to do during the holiday, but it doesn’t have to be the only one! Other Easter-related crafts can be fun and exciting for families or classrooms to do during the springtime. Here are 5 easy Easter crafts for kids to make.
Easter Sock Bunnies
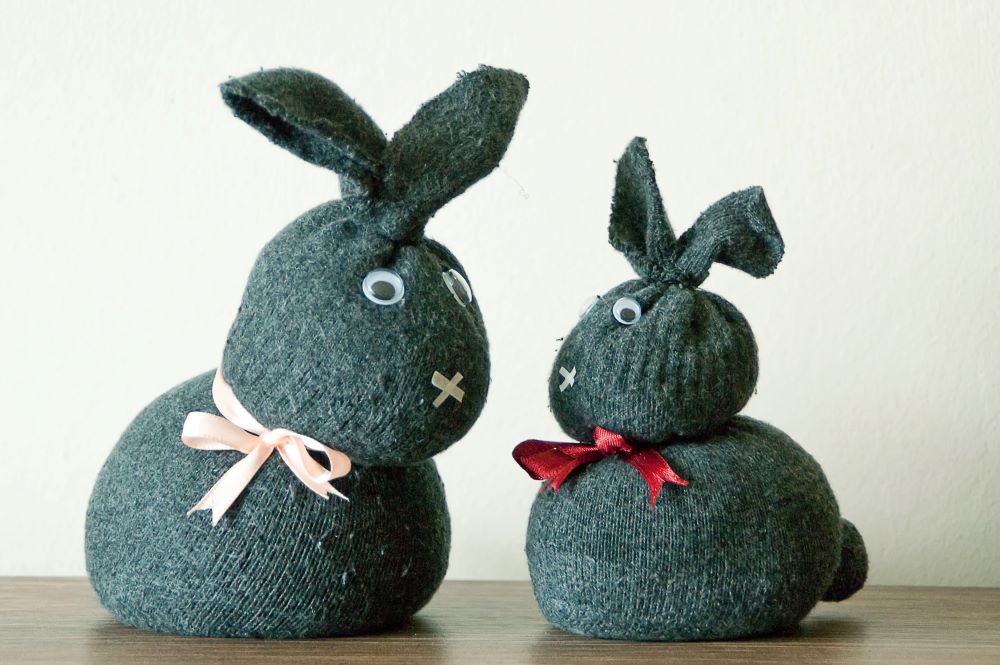
These sock bunnies are not only adorable but they are fairly simple for kids to make with a little bit of adult supervision.
You can use any sock size and color that you want and your kids can be creative with the details on the bunny. This is a great craft to make before Easter so you can display the sock bunnies as decorations when the holiday arrives!
Supplies Needed
A Sock
Felt
A Pom Pom
Googly Eyes
Ribbon
Clear Rubber Bands
Rice (Uncooked)
Instructions
Step 1: Start by filling up your sock with the rice. Make sure to fill it up completely but leave some room at the top for the ears.
Step 2: Using clear rubber bands, section off the sock on the bunny’s neck and top of its head to create the outline of the body, head, and ears.
Step 3: Next, it’s time to create the bunny’s ears. Cut the top section of the sock in half to split it into two ears. Round off the edges to make them look more like bunny ears.
Step 4: Now it’s time to add the details on the sock bunny. Glue on googly eyes and a pom pom for the tail. Cut out a felt nose and teeth to glue on, or simply glue an “X” symbol as their nose. Finally, use the ribbon to tie a bow around the bunny’s neck.
Paper Rosette Chick

The paper rosette chick is a cute and bright Easter craft that encourages kids to follow directions while having fun!
Due to specific folding techniques, this craft is a good match for older kids, but any kids can make this craft with help from an adult. This is an especially fitting craft for a family Easter party or a festive classroom activity.
Supplies Needed
Yellow Paper
Orange Paper
White Paper
Black Marker
Glue
Scissors
Yarn
Instructions
Step 1: Take a piece of yellow paper and fold it in half crosswise. Then, cut the paper in half along the fold line.
Step 2: Take one of the newly cut yellow pieces and fold it in half crosswise. Then, fold one edge to the center and repeat with the opposite edge.
Step 3: Repeatedly fold the edges into the center, alternating sides, until it’s completely folded into long, skinny piece.
Step 4: Unfold the paper and press along the “mountains” you made to define the creases.
Step 5: Repeat steps 2-4 with the other half of the yellow paper.
Step 6: Glue the two accordion papers together to make them a full piece of paper again. Then, push them back into a closed accordion and tie a piece of yarn around the middle.
Step 7: Apply glue on the edges and glue together to form a full circle.
Step 8: Lastly, glue on the details of the chick: white paper circles filled in with black marker pupils for the eyes, an orange upside down triangle for the nose, 2 orange feet, and 2 yellow wings.
Toilet Paper Roll Easter Bunnies

Simple and easy to make, these toilet paper roll bunnies are the perfect Easter craft for young kids to make with just a little bit of help from an adult!
These little bunnies can be painted and decorated in any way your kid wants – creativity and personalization is encouraged in this project!
Supplies Needed
Empty Toilet Paper Roll
Paint (Any Color)
Googly Eyes
Black Paper
White Paper
Small Pom Pom (Bunny Nose)
Large Pom Pom (Bunny Tail)
Instructions
Step 1: Start by cutting out 2 bunny ears with the white paper. Glue these ears on the inside of the toilet paper tube so they stick up on top.
Step 2: Paint the entire toilet paper roll, along with the ears. Use any color you want to make your bunny unique! Let the paint dry before you move on to step 3.
Step 3: Once the paint dries, glue on 2 googly eyes. Cut out thin strips of the black paper to make the whiskers and glue them on accordingly.
Step 4: Finally, glue on a small pom pom for the nose and glue on a larger pom pom for the tail.
Felt Easter Eggs
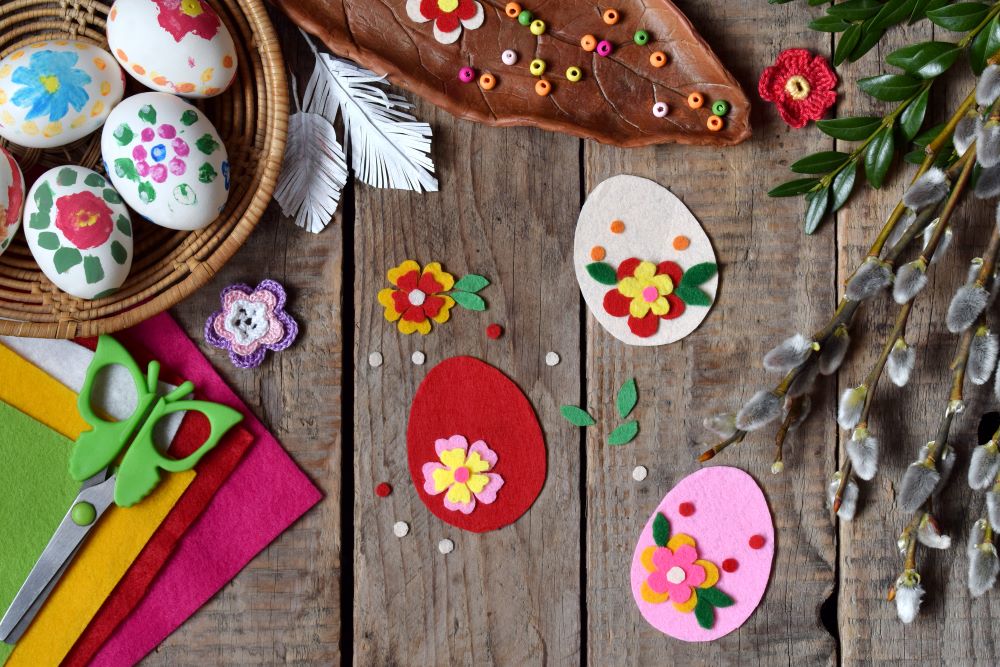
Felt Easter eggs is a fun craft that kids and adults will equally enjoy! Adult supervision is recommended for the staples, but this craft is doable for people of all ages.
These festive eggs can be used as colorful decorations during Easter – simply place them in a decorative bowl with other Easter accents. It’s a great way to show off your kids’ creative work!
Supplies Needed
Felt (Variety Of Colors)
Polyester Stuffing
Colored Staples
Scissors
Glue
Instructions
Step 1: Cut out 2 felt oval shapes equal in size. Staple them together along the edges, but make sure to leave a small opening at the top.
Step 2: Add the polyester stuffing into the egg until its completely filled. Then, staple together the opening.
Step 3: Now it’s time to cut out designs and shapes that you want to put on the egg. This can be whatever you want – flowers, stripes, circles, etc.
Step 4: Glue these shapes onto the egg in the pattern of your choosing.
Step 5: Make as many felt eggs as you want in your own creative style!
Paper Easter Egg Wreath
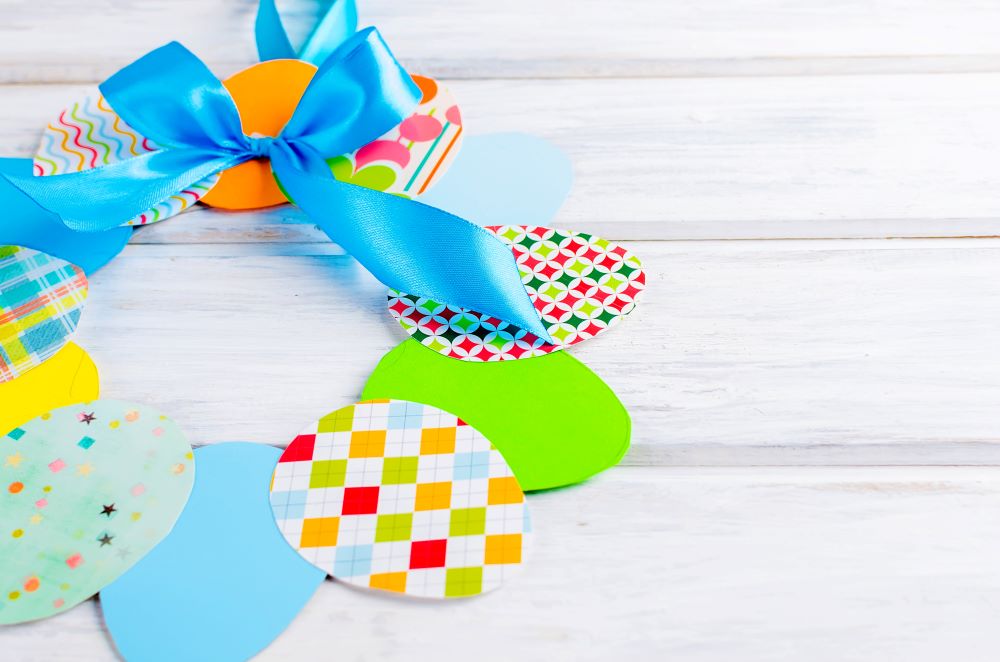
The Paper Easter Egg Wreath craft is just as fun to make as it is to put on display as a colorful decoration!
Your kids can come with you to the craft store to pick out their favorite patterned paper for this project so they can incorporate their personality and interests into their wreath – so fun!
Supplies Needed
Paper Plate
Patterned & Colored Paper
Egg-Shaped Stencil Or Cookie Cutter
Glue
Ribbon
Scissors
Instructions
Step 1: First, cut out the inner section of the paper plate so you’re left with the outer ring in tact.
Step 2: Cut out egg shapes using different patterned papers. Make sure they are all the same size by using an egg-shaped stencil or cookie cutter.
Step 3: Glue the paper eggs on the back of the paper plate ring. Make sure they slightly overlap and cover the entire ring.
Step 4: After you finish gluing all your paper eggs, cut a piece of your ribbon and tie it into a bow. Then, glue it on top of one of the eggs.
Step 5: Cut another piece of ribbon and fold it into a loop. Glue it to the back of the wreath – now you have a hanger to hang the wreath up wherever you want!
Get even more into the Easter spirit with our selection of Easter Decor & More! From fun bunny decorations to cute Easter basket fillers to spring accents and more, there’s something for everyone to enjoy!