
5 Easy DIY Outdoor Furniture & Decor Ideas For Your Porch & Garden
Adding some personal touches to your yard and garden can make your outdoor space look beautifully decorated and styled. Crafting your own outdoor items will not only add to that unique look, but it can also save you money. Here are 5 easy DIY outdoor furniture and decor ideas for your porch and garden.
1. DIY Cinder Block Bench
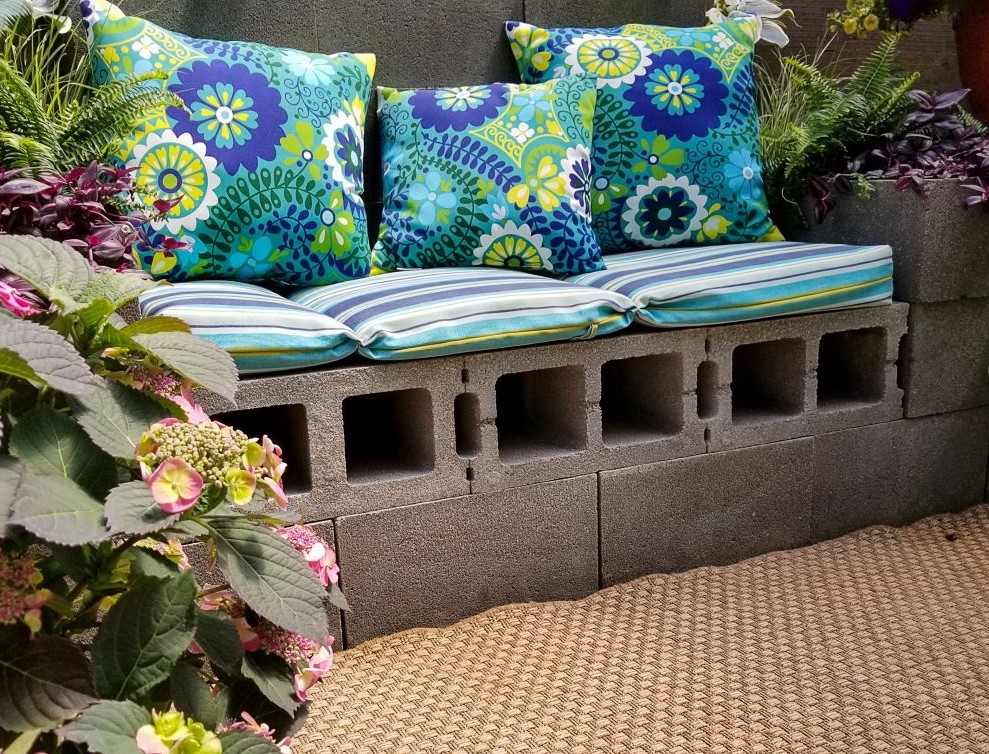
This DIY cinder block bench is very easy and simple, and results in a unique looking piece of furniture for your outdoor space. The bench is easy to deconstruct when necessary, so there’s no need to worry about having a permanent structure.
The bench is ideal for your backyard patio up against the wall of your house. It’s a great option if you don’t have a lot of room for large pieces of furniture because you can make this cinder block bench whatever size you want.
Supplies Needed
Cinder Blocks
Outdoor Couch Cushions
Measuring Tape
Outdoor Pillows (Optional)
Instructions
Step 1: First, you’ll want to measure your couch cushions and determine the total length and width your bench needs to be.
Step 2: Stack your cinder blocks up to the correct width and length. You’ll want to build your makeshift bench against a wall because you’re not using any adhesive to keep them together.
Step 3: Feel free to add extra blocks on each side of the bench for makeshift armrests.
Step 4: Add your couch cushions on top, along with some outdoor pillows (optional), and you have yourself an instant outdoor couch!
2. DIY Mosaic Side Table
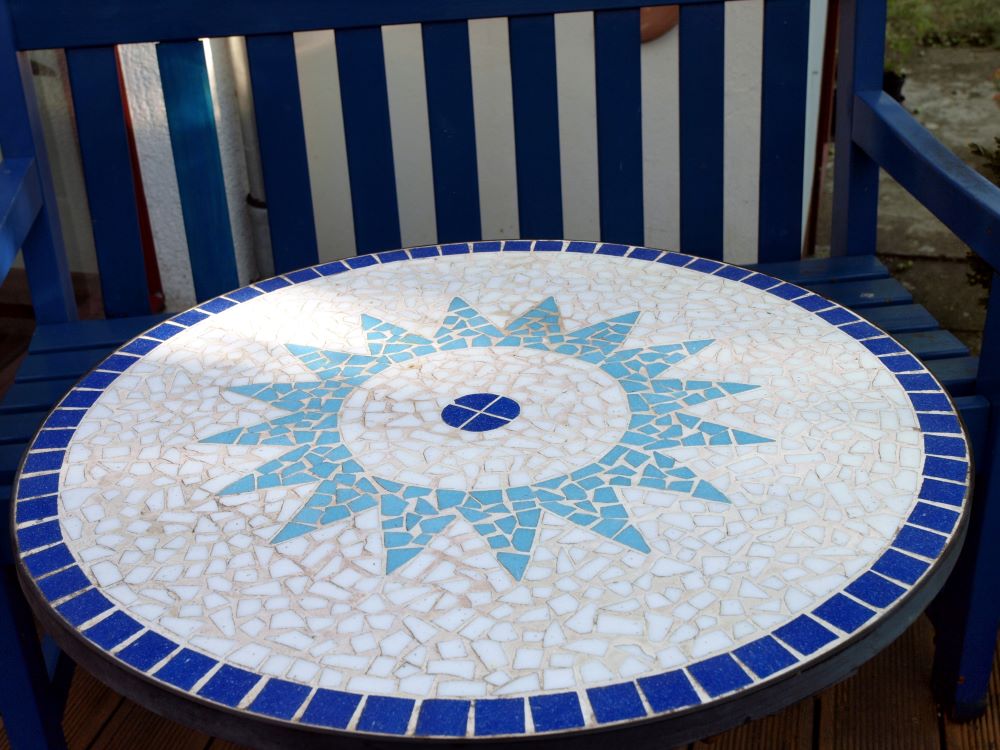
Mosaic pieces can add a lot of beautiful colors to your outdoor space. You can make this DIY mosaic side table to be uniquely your style by choosing your favorite colors and using your creative vision to make an interesting pattern.
Display this table on your patio with some relaxing lounge chairs or your front porch with beautiful outdoor bench.
Supplies Needed
Old Wooden Table
Butcher Paper
Variety Of Ceramic Tiles
Hammer
Tile Adhesive
Grout
Sealing Spray
Instructions
Step 1: Start by prepping your old wooden table. Sand down any rough edges of the tabletop until smooth.
Step 2: Create your mosaic pieces by hammering a variety of ceramic tiles. Be careful with this step – wrap the tiles in a sheet and hammer them outside in the grass.
Step 3: Cut out a piece of butcher paper to match the size of the tabletop. You’ll be laying out your mosaic pattern on the paper before setting the pieces on the table.
Step 4: Create your pattern on the butcher paper with the broken tile pieces. You can make it as random or orderly as you want.
Step 5: Start to carefully glue the tiles to the table in the pattern you laid out. Make sure to leave some space between each piece. Once every piece is glued down, let dry overnight.
Step 6: Next, fill in the gaps with grout. Make sure you scrape off the excess until it’s nice and smooth. Let it dry for 24 hours.
Step 7: Finally, wipe down the tiles with soap and water until clean, and then spray with sealer.
3. DIY Tire & Wood Table

This DIY wood and tire table is bright and interesting, perfect for anyone who has a whimsical garden or yard. If you are keen on recycling and reusing materials in clever ways, this is a great craft for you to try!
This makeshift table isn’t permanently wielded together, making it easy to move around whenever you want, and making it easy to store away when the weather starts to get cold.
Supplies Needed
Large Truck Tires (Or 2 Regular Tires)
Wood Pallet
2-In-1 Spray Paint & Primer (Any Colors You Want)
Instructions
Step 1: First you’ll want to spray paint your tire(s). You can opt to have them be a solid color or you can do a multi-colored pattern. Let dry.
Step 2: While you let the tire(s) dry, prep your wood pallet. Sand down the wood if there’s any rough edges and make sure it’s completely smooth.
Step 3: Spray paint your wood pallet in the color of your choice. It’s best to do a contrasting color to get a unique effect. Let the paint dry.
Step 4: If you have 2 tires, stack them on top of each other. If you have 1 large tire, move to step 5.
Step 5: Simply place the wood pallet on top of the tire(s) for an instant table!
4. DIY Tree Stump Side Table
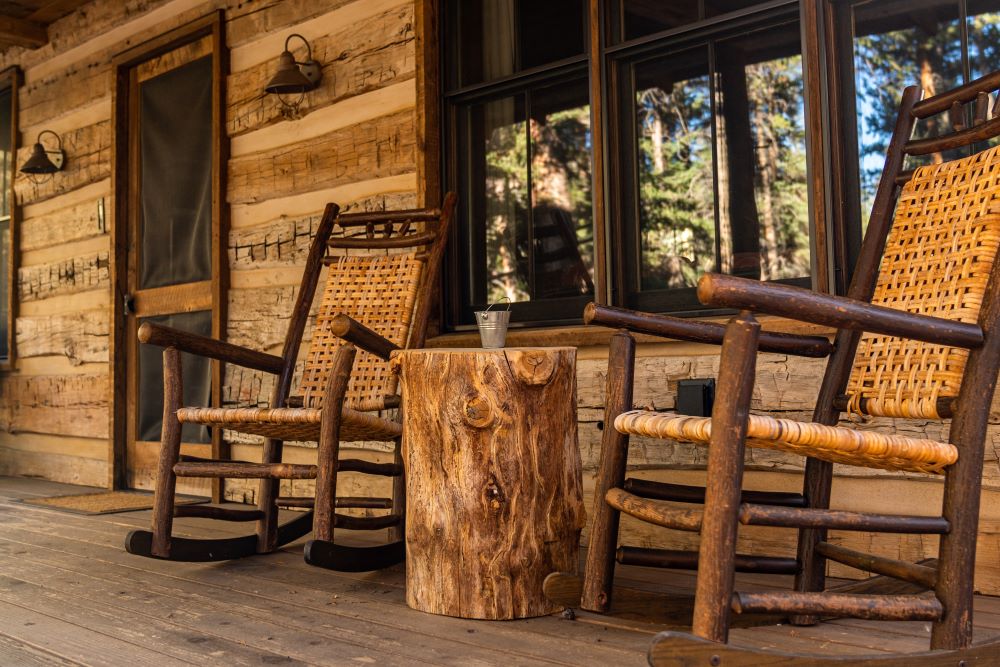
This DIY tree stump side table is a nice natural looking piece of furniture that fits in well with the rustic wood cabin decor style. If you like the idea of using natural materials in your crafts, this project is for you!
It’s best to display this side table on a covered porch to protect it from any rain or harsh weather. If the table gets wet, it’s susceptible to mold, so you’ll want to make sure to use it wisely.
Supplies Needed
Tree Stump
Flat Tip Screwdriver
Bleach & Water
220-Grit Sandpaper
Wood Stain (Any Color You Want)
Polyurethane (Semi-Gloss)
Instructions
Step 1: First you’ll need to find a tree stump. If you don’t have the ability to get your own, a great option is to contact a local tree services company. They usually have stumps and extra wood.
Step 2: Next, you’ll need to remove the bark from the tree stump. Use a flat tip screwdriver to help you pry it off.
Step 3: Using bleach and water, clean the tree stump as best as you possibly can. You’ll want to make sure there is no mold. Let the tree stump dry completely before you move on to the next step.
Step 4: Sand down your stump until it’s completely smooth.
Step 5: Stain the wood in any color you want. Use a lighter stain for a more natural look or a darker stain for a different type of appearance.
Step 6: Finish it off with polyurethane. Let it dry before displaying your work!
5. DIY Stone Fire Pit
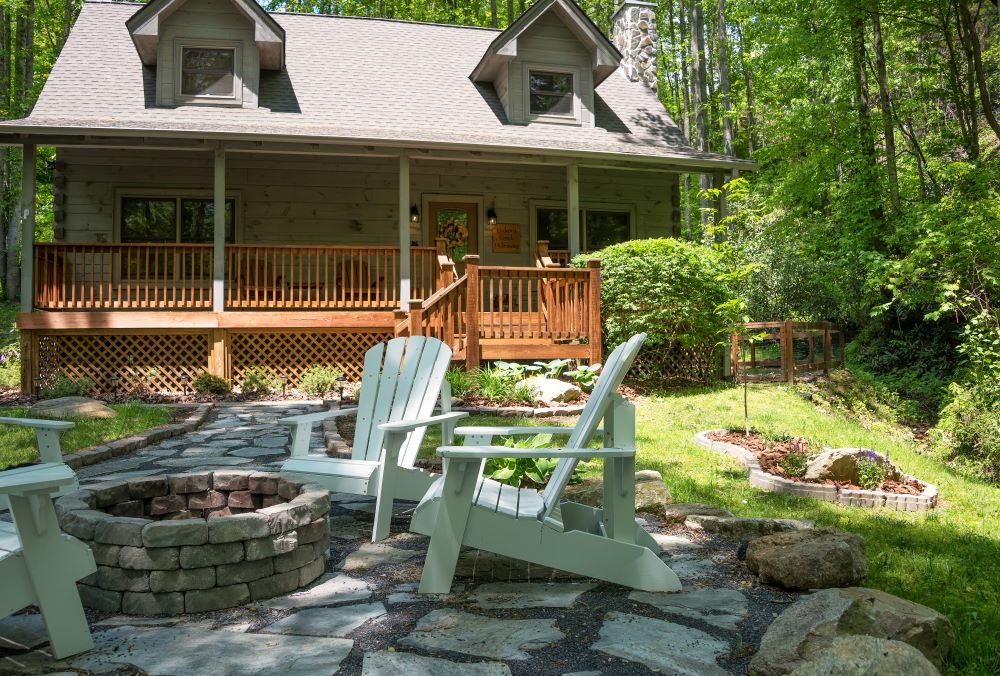
Love the idea of a stone fire pit but don’t want to spend a lot of money to get one? This DIY stone fire pit will not only save you money, but it’s also fairly simple to make!
These instructions are for a fire pit that is placed on top of a patio. This is generally easier than placing it in the grass. Place some adirondack chairs around the fire pit for a nice way to relax on summer nights.
Supplies Needed
Round Fire Ring
Granite Edging Stones
Concrete Adhesive
#57 Granite Stones
Instructions
Step 1: Place your fire ring on top of your patio where you want the pit to be.
Step 2: Lay your granite edging stones around the fire ring in the pattern that you want. It’s important to lay them out before gluing them together.
Step 3: Once you have the layout, glue each brick together using concrete adhesive. Note: this adhesive is very strong, make sure to use it very carefully.
Step 4: Now it’s time to create your second layer of stones. Gently lift the fire ring up and create another ring of stones around it. Glue together your second layer.
Step 5: Push your fire ring back to the bottom.
Step 6: Fill the pit with #57 granite stones. You’re done!
Looking to add more furniture to your outdoor space in addition to your DIY projects? Check out our selection of Outdoor Furniture!
Check out these 7 Easy DIY Planters For Your Garden for even more outdoor DIY inspiration!


Thank you for the advice to build a bench out of cinderblocks and use a back wall to support the design. I just moved into a new home, and I want to decorate the exterior in a super cute and fun way so that my grandkids can play in it all the time! I really love your ideas. Maybe, I should also look into solar leaf windmills that could spin and entertain my grandkids.
So many great ideas here, I’ve been wanting to bang up an outdoor table and bench chairs out of some pallet wood I’ve reclaimed, and never would have thought of using tires but I think that’s what I’ll have a go at making. Think the grandkids will love mucking around with the spray paint ha ha
wow! These are great ideas! Thanks for sharing